Introduction to OAuth2 and tokens in OnPay
Short introduction to first-time authorization against OnPay with OAuth2. Once this process is completed, you will be in possession of access and refresh tokens, which will be used in a custom API implementation in the future.
Token expiry
Access token = 24 hours. Refresh token = 3 months. Notice: Token expiration is extended as soon as a request is made to OnPay. Notice: Tokens cannot be recreated but require you to repeat the process below to request a new set of tokens.
Client
To access OnPay via API, you must first request an access and refresh token. This can be done via a number of clients already available on the web (e.g. Postman or Curl etc.).
Postman example
Postman is a client that can make a number of requests, including OAuth2, which is handy as the software supports all steps in the procedure. Download and install the client via https://www.getpostman.com
Principle
- You send a request to the OnPay URL provided.
- Postman then gets a response back and opens the OnPay login page associated with this session.
- In the dialog, you log in with your OnPay user, after which OnPay asks if you want to approve the request you just sent (standard OAuth2 procedure).
- You will then receive your access and refresh token.
Use OnPay API with Postman
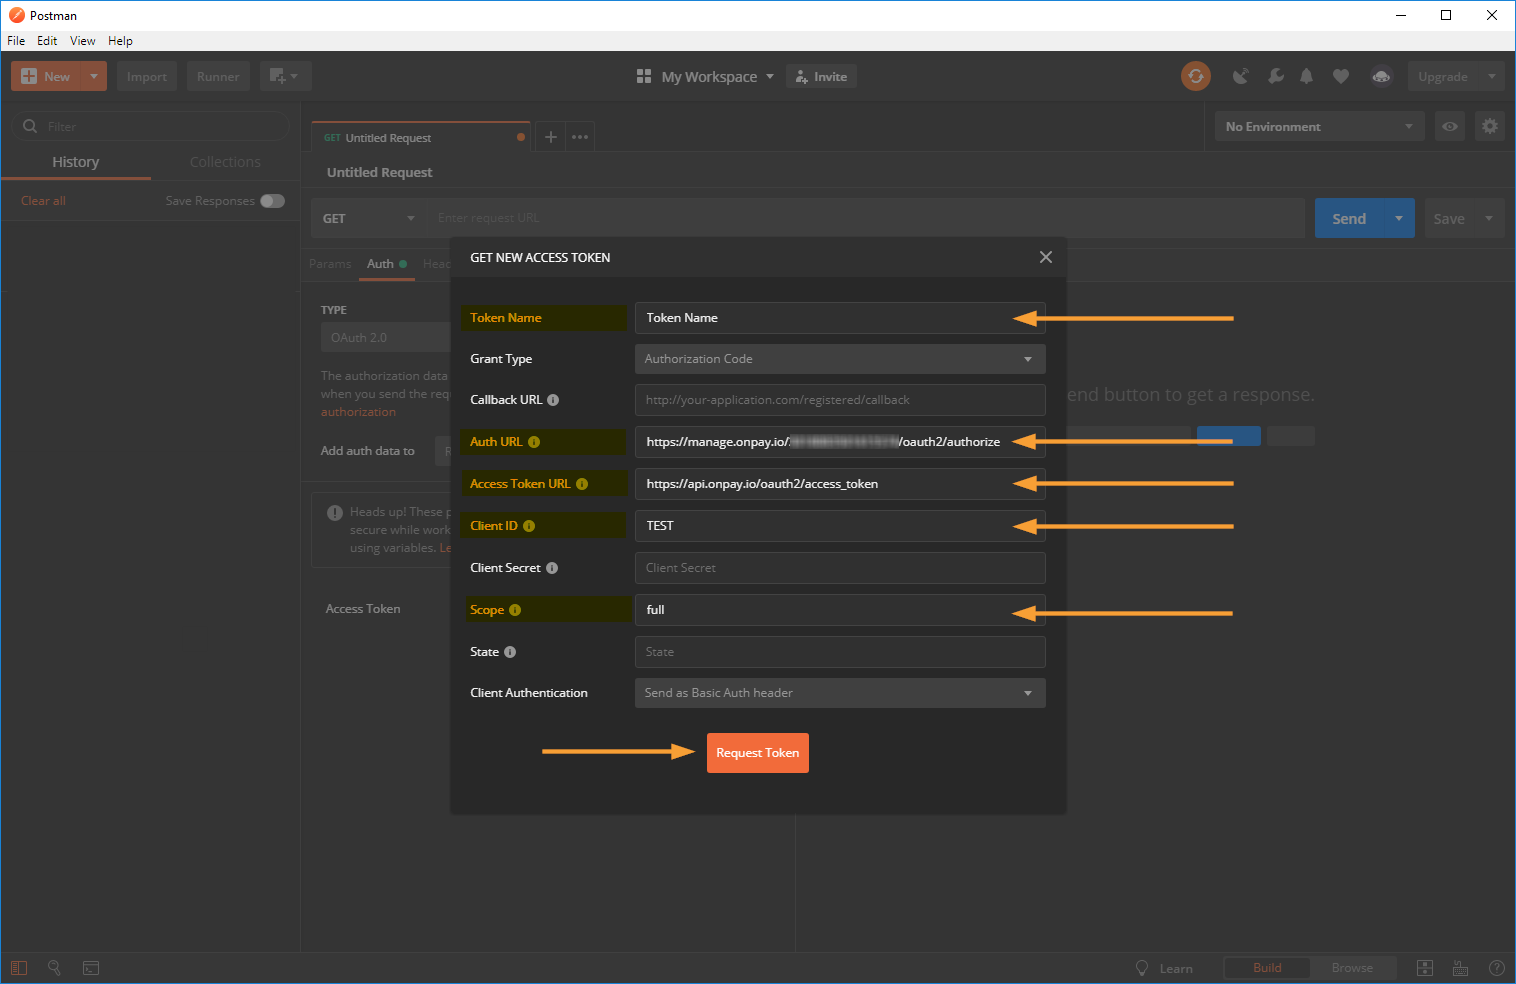
- Start Postman and click Auth.
- Select the type OAuth 2.0
- Click Get New Access Token

- In the dialogue, insert the following values: Auth URL, Access Token URL, Client ID and Scope. The rest can be left blank in Postman for this dialogue.
Values from OnPay for insertion in Postman You make a request using the following values, which are also available in the OnPay documentation:
| Value | Description |
|---|---|
| Authorize_url | https://manage.onpay.io/{gateway_id}/oauth2/authorize (Remember to change the Gateway ID and remove the curly brackets: { } ) |
| Access_url | https://api.onpay.io/oauth2/access_token |
| Client ID | The name of your app. This can be seen in OnPay later, with the expiration date for your tokens under API > Active API tokens. |
| Scope | full (This is the only scope value supported by OnPay for the moment) |
Link to the OnPay documentation, where the above values can be found: https://onpay.io/docs/technical/api_v1.html

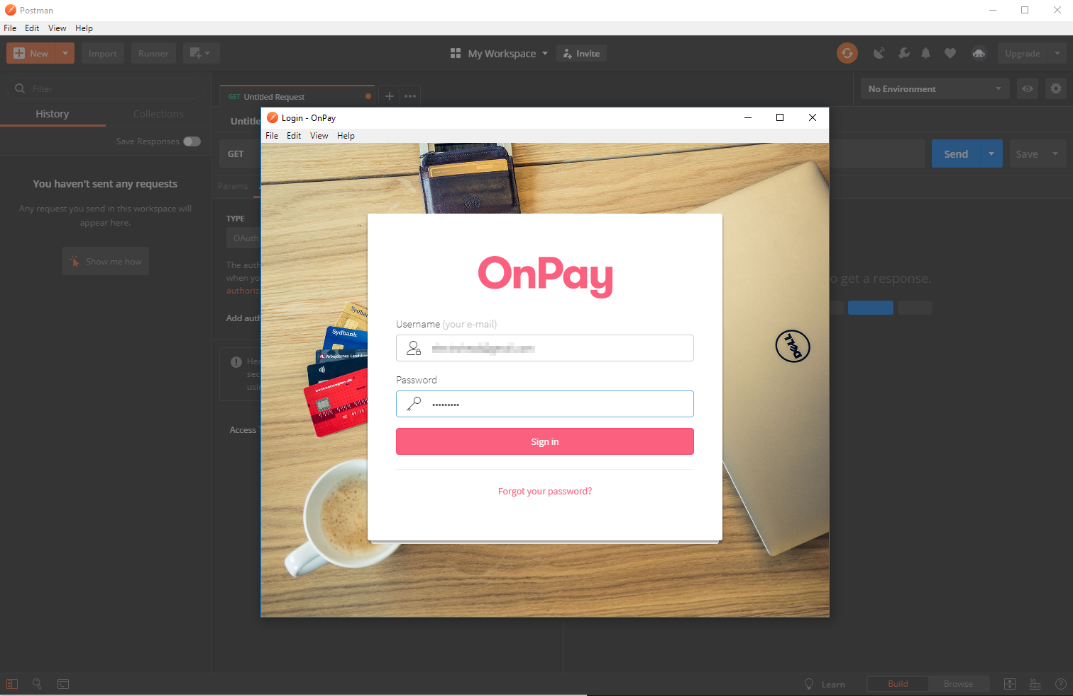
- The request is then submitted and you are presented with the OnPay login page where username (email) and password is entered:

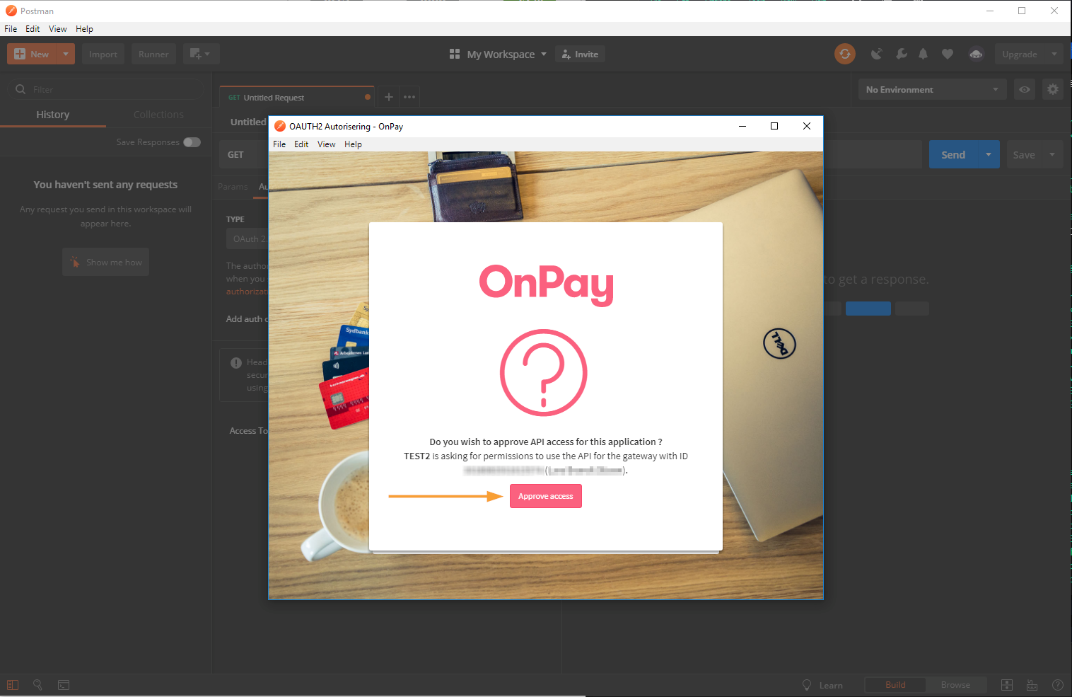
- You will then be presented with a dialog to complete the authorization. Click Approve access:

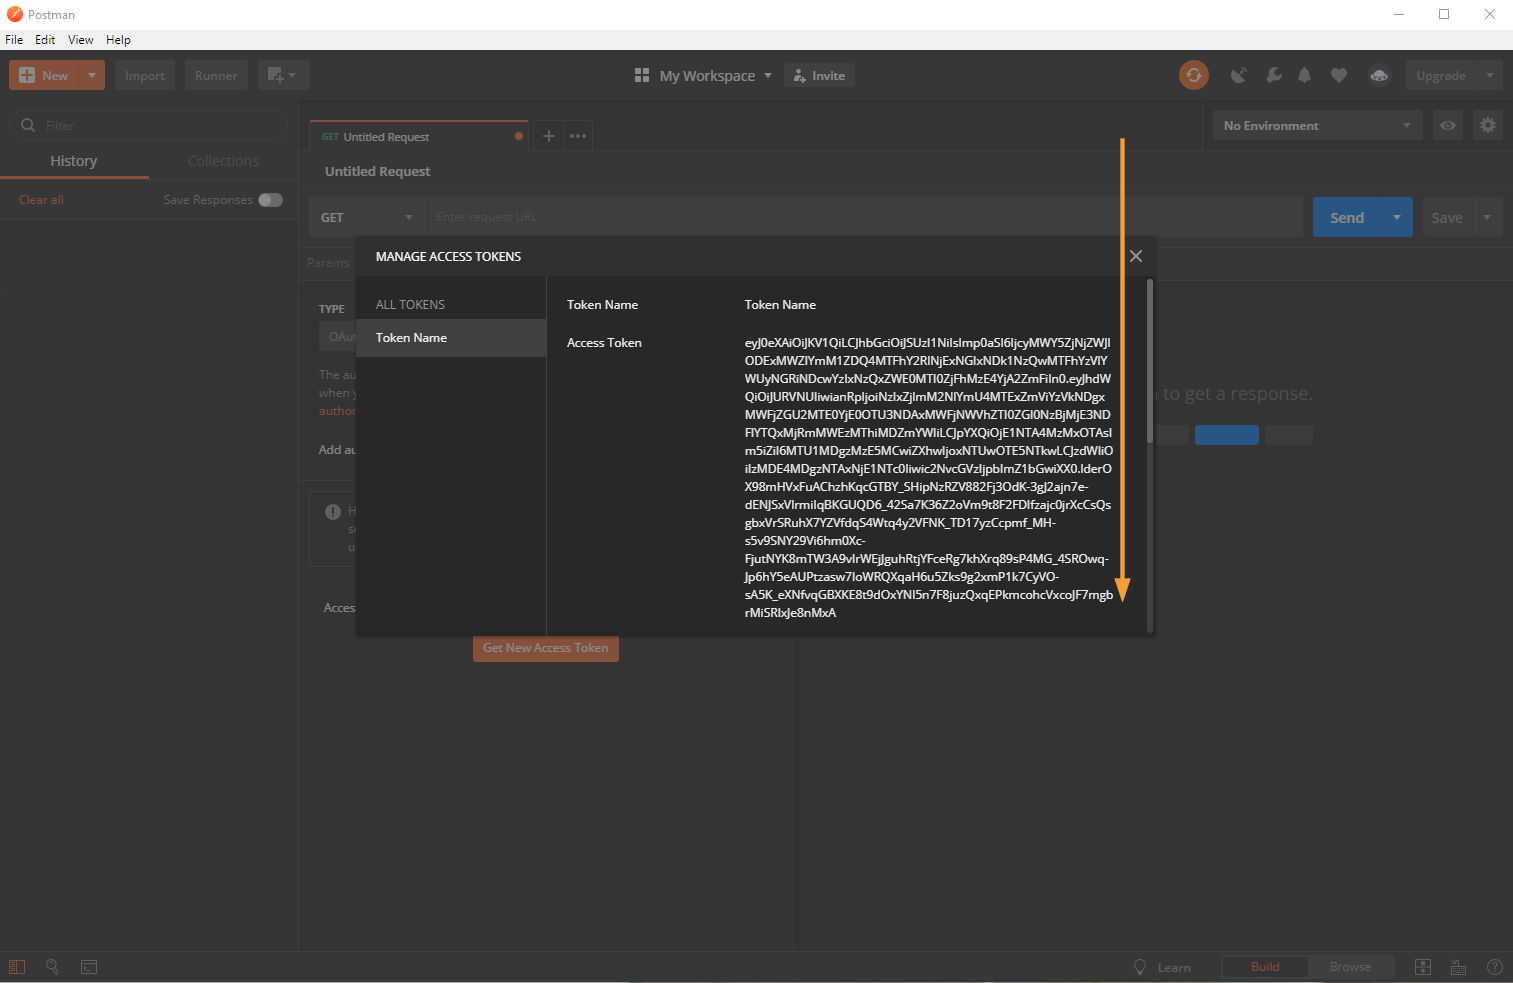
- Once this is done, Postman receives access and refresh tokens, which you copy and save for use in your application:

What do tokens look like?
Acess Token
eyJ0eXAiOiJKV1QiLCJhbGciOiJSUzI1NiIsImp0aSI4IjcyMWY5ZjNjZWJlODExMWZlYmM1ZDQ4MTFhY2RlNjExNGIxNDk1NzQwMTFhYzVlYWUyNGRiNDcw YzIxNzQxZWE0MTI0ZjFhMzE4YjA2ZmFiIn0.eyJhdWQiOiJURVNUIiwianRpIjoiNzIxZjlmM2NlYmU4MTExZmViYzVkNDgxMWFjZGU2MTE0YjE0OTU3NDAxM WFjNWVhZTI0ZGI0NzBjMjE3NDFlYTQxMjRmMWEzMThiMDZmYWIiLCJpYXQiOjE1NTA4MzMxOTAsIm5iZiI6MTU1MDgzMzE5MCwiZXhwIjoxNTUwOTE5NT kwLCJzdWIiOiIzMDE4MDgzNTAxNjE1NTc0Iiwic2NvcGVzIjpbImZ1bGwiXX0.lderOX78mHVxFuAChzhKqcGTBY_SHipNzRZV882Fj3OdK-3gJ2ajn7e-dENJSxVl rmiIqBKGUQD6_42Sa7K36Z2oVm9t8F2FDlfzajc0jrXcCsQsgbxVrSRuhX7YZVfdqS4Wtq4y2VFNK_TD17yzCcpmf_MH-s5v9SNY29Vi6hm0Xc-FjutNYK8mTW3 A9vIrWEjJguhRtjYFceRg7khXrq89sP4MG_4SROwq-Jp6hY5eAUPtzasw7IoWRQXqaH6u5Zks9g2xmP1k7CyVO-sA5K_eXNfvqGBXKE8t9dOxYNl5n7F8juzQxq EPkmcohcVxcoJF7mgbrMiSRlxJe8nMxA
Refresh token
eyJ0eXAiOiJKV1QiLCJhbGciOiJSUzI1NiIsImp0aSI4IjcyMWY5ZjNjZWJlODExMWZlYmM1ZDQ4MTFhY2RlNjExNGIxNDk1NzQwMTFhYzVlYWUyNGRiNDcw YzIxNzQxZWE0MTI0ZjFhMzE4YjA2ZmFiIn0.eyJhdWQiOiJURVNUIiwianRpIjoiNzIxZjlmM2NlYmU4MTExZmViYzVkNDgxMWFjZGU2MTE0YjE0OTU3NDAxM WFjNWVhZTI0ZGI0NzBjMjE3NDFlYTQxMjRmMWEzMThiMDZmYWIiLCJpYXQiOjE1NTA4MzMxOTAsIm5iZiI6MTU1MDgzMzE5MCwiZXhwIjoxNTUwOTE5NT kwLCJzdWIiOiIzMDE4MDgzNTAxNjE1NTc0Iiwic2NvcGVzIjpbImZ1bGwiXX0.lderOX78mHVxFuAChzhKqcGTBY_SHipNzRZV882Fj3OdK-3gJ2ajn7e-dENJSxVl rmiIqBKGUQD6_42Sa7K36Z2oVm9t8F2FDlfzajc0jrXcCsQsgbxVrSRuhX7YZVfdqS4Wtq4y2VFNK_TD17yzCcpmf_MH-s5v9SNY29Vi6hm0Xc-FjutNYK8mTW3 A9vIrWEjJguhRtjYFceRg7khXrq89sP4MG_4SROwq-Jp6hY5eAUPtzasw7IoWRQXqaH6u5Zks9g2xmP1k7CyVO-sA5K_eXNfvqGBXKE8t9dOxYNl5n7F8juzQxq EPkmcohcVxcoJF7mgbrMiSRlxJe8nMxA
It doesn't matter if you develop your API integration in PHP, .Net or a different language all together. Once you have your tokens, they can be used to make requests to the OnPay API.
Software development kits
PHP SDK
https://github.com/onpayio/php-sdk
OAuth2 Client (PHP client) which can be used for OAuth2 integration in PHP applications
https://oauth2-client.thephpleague.com/usage/
.NET SDK
https://github.com/onpayio/dotnet-onpay
OnPay API documentation
https://onpay.io/docs/technical
The OAuth2 Concept
https://dev.to/anabella/dancing-with-oauth-emp