OnPay and Prestashop
In this article we will show how to connect OnPay to PrestaShop
Use our step-by-step guide
-
Log in to PrestaShop and click Modules > Module Catalog. Search for onpay.io and click Install as shown here:

Notice: If you don't see the OnPay plugin listed, you will need to install it manually before following this guide. See how to perform a manual installation at the bottom of the article.
-
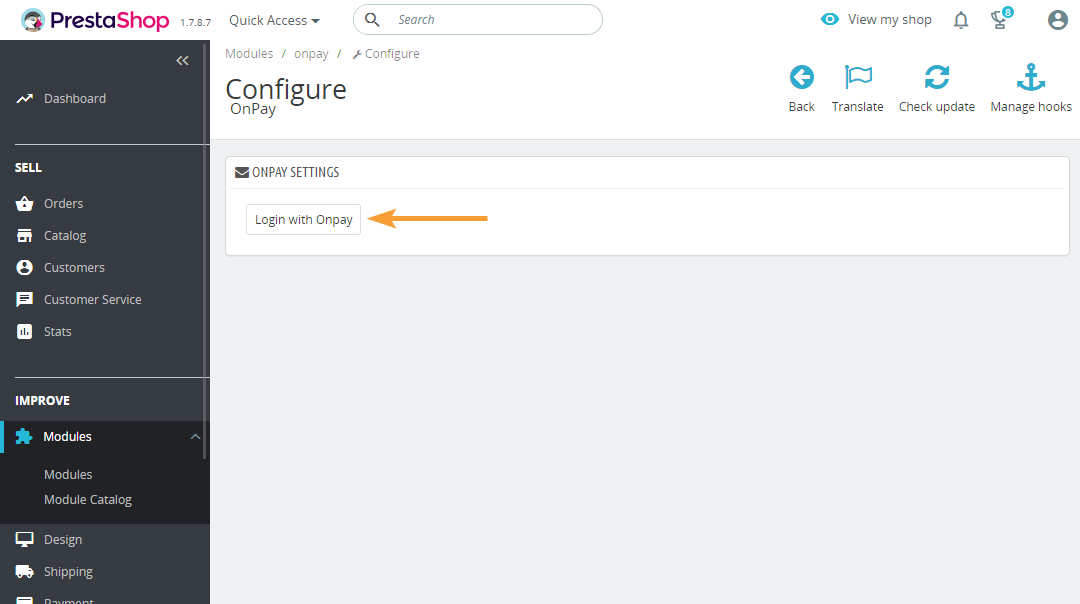
Click Modules > Modules, filter by Payment and click Configure:

-
Click Login with OnPay to connect your OnPay gateway to your PrestaShop webshop:
-
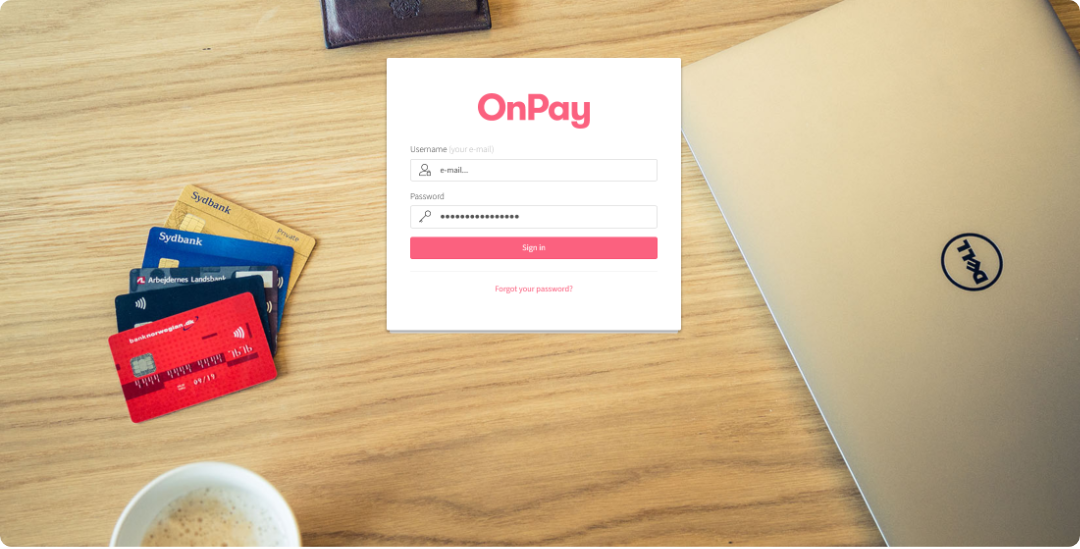
If you are not already logged in to OnPay, you will now be asked to log in:
-
Approve the connection by clicking Approve access:
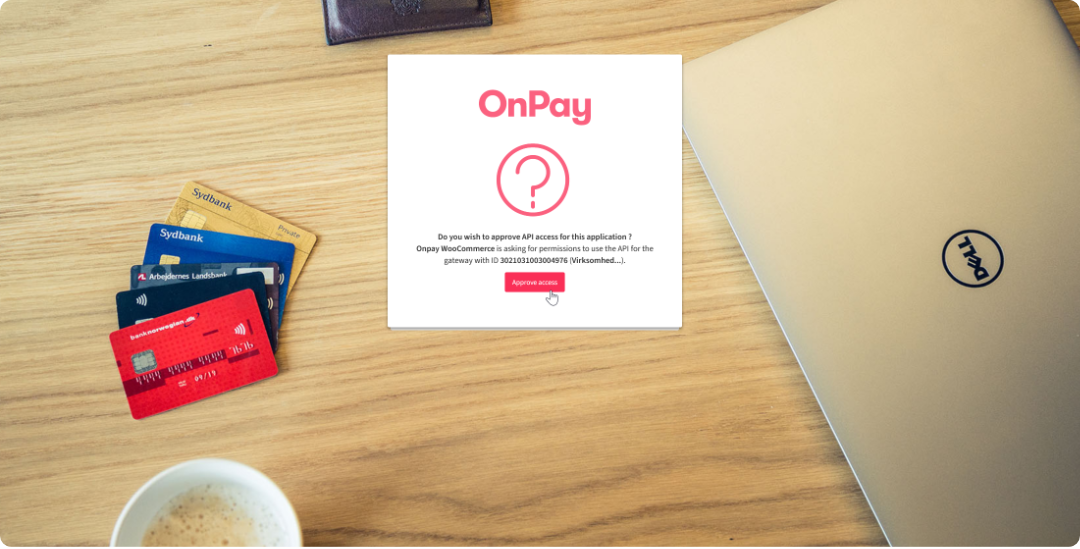
Notice: If your email address is used to manage multiple OnPay solutions, you will be asked to select the gateway you want to connect to PrestaShop.
-
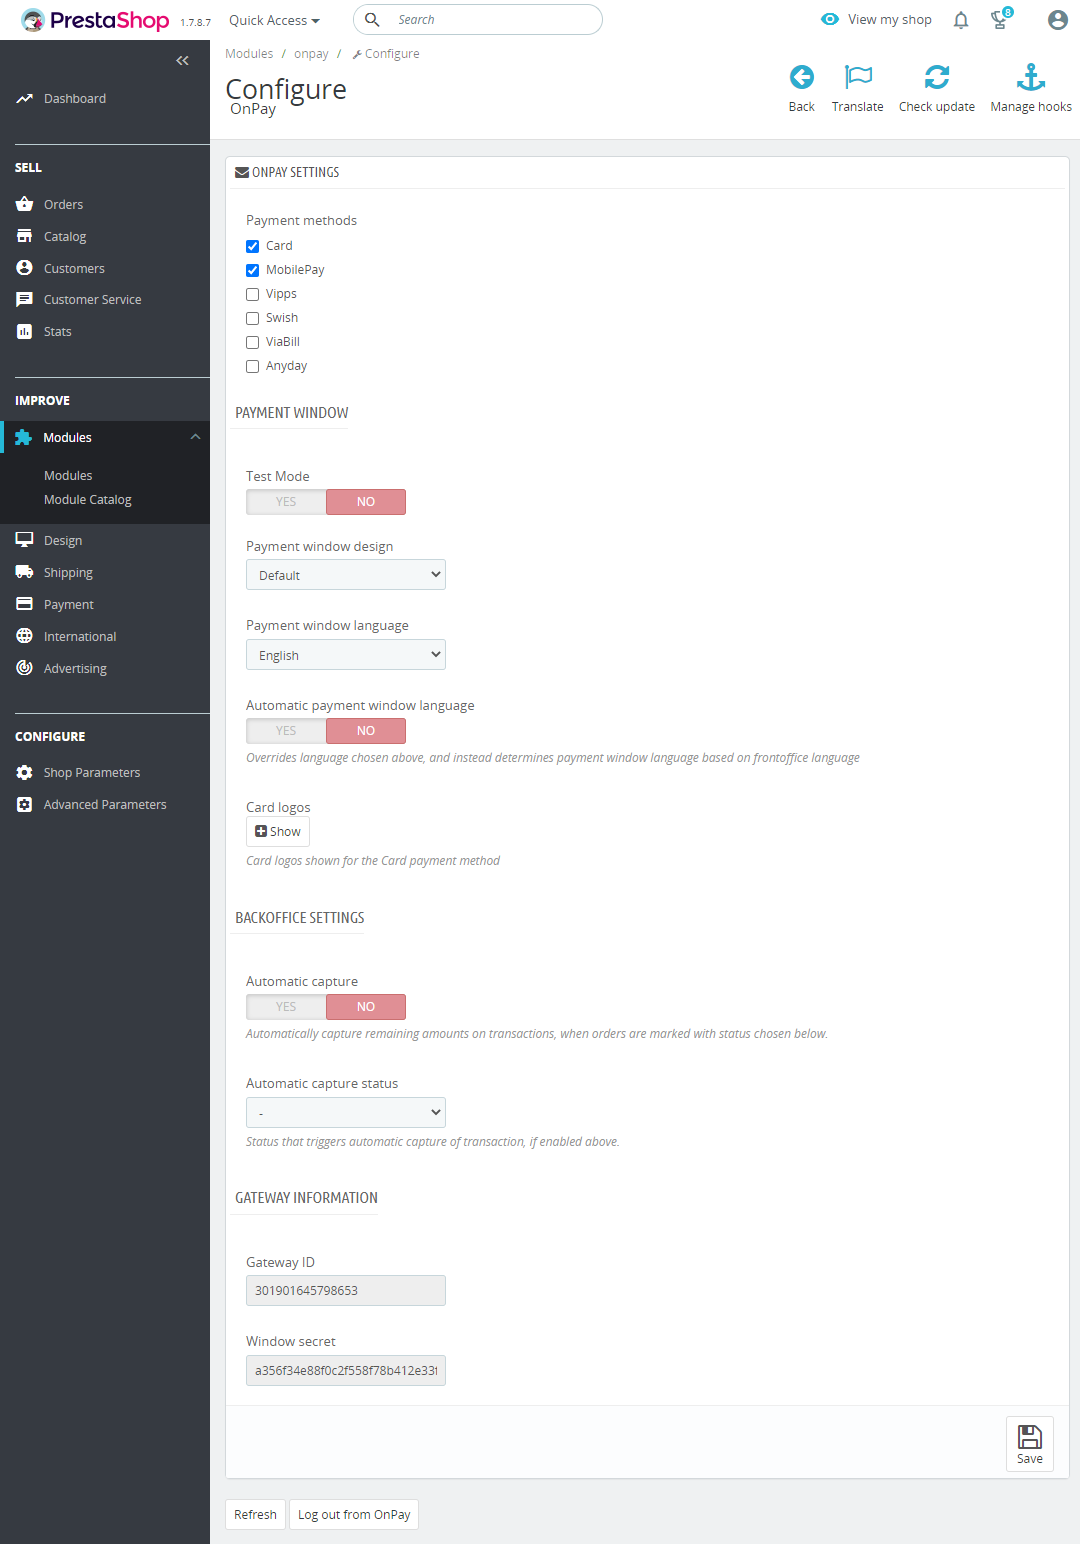
Select your desired options for payment methods and available card types. This should mirror your settings in OnPay and your acquiring agreement. Click Save to complete the setup:
-
Remember to test the connection using test cards (if the OnPay solution is in testmode) and ultimately with real payment cards. You can find test cards here. Remember that wallets, such as MobilePay, also have an underlying payment card, which will have to be included in your acquiring agreement.
Manual installation
Download onpay.zip and click Upload a module under Module Catalog. OnPay will be ready for installation as shown in step 1 of this guide.
Use the above link to manually update your OnPay plugin to the latest version