OnPay and WooCommerce
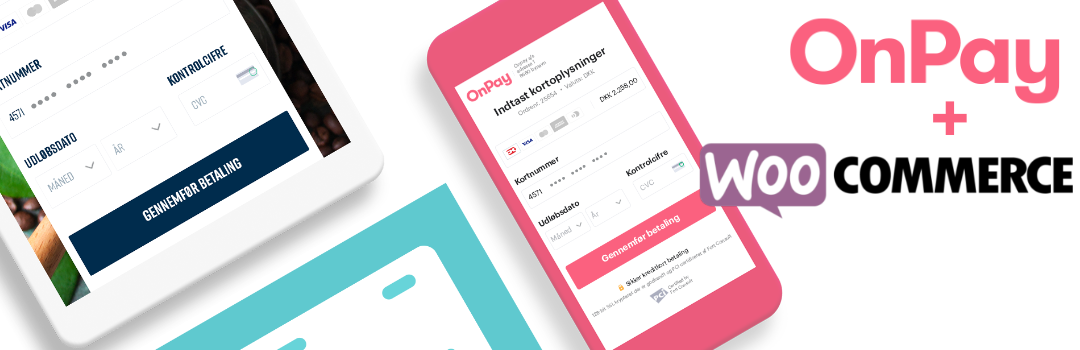
OnPay and WooCommerce
Connect OnPay to your WooCommerce store to start accepting payments. The setup takes just a few minutes.
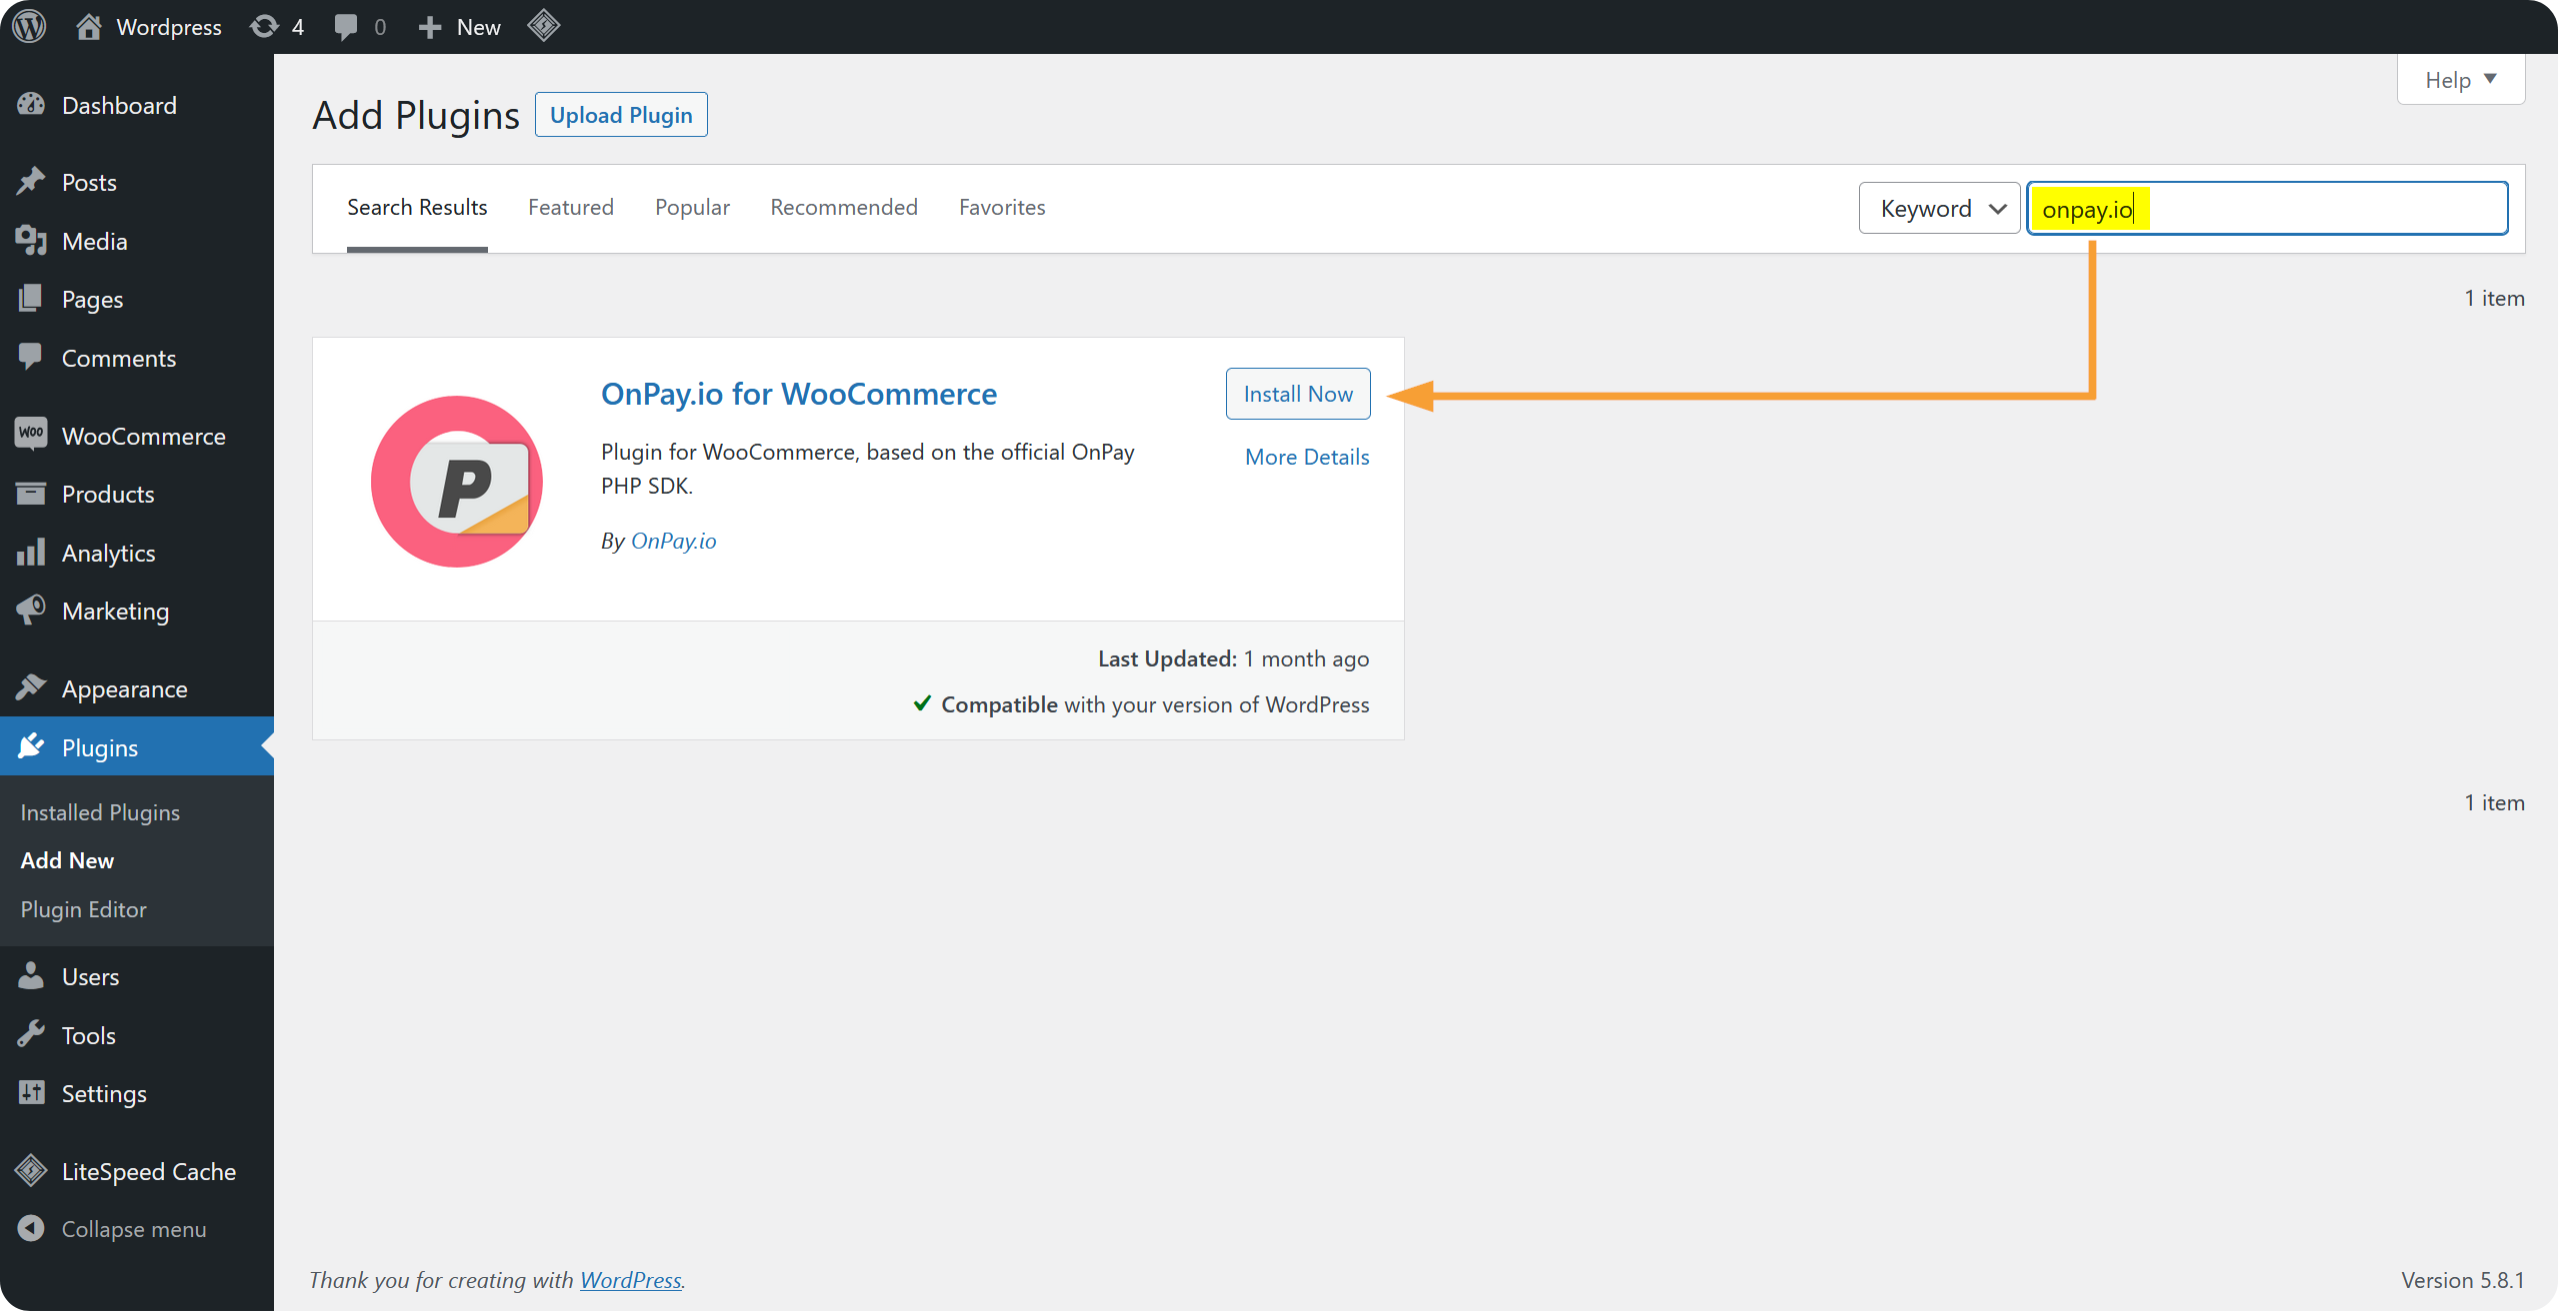
Step 1: Install the OnPay plugin
- Log in to your WordPress dashboard
- Go to Plugins → Add New
- Search for "onpay.io"
- Click Install Now, then Activate
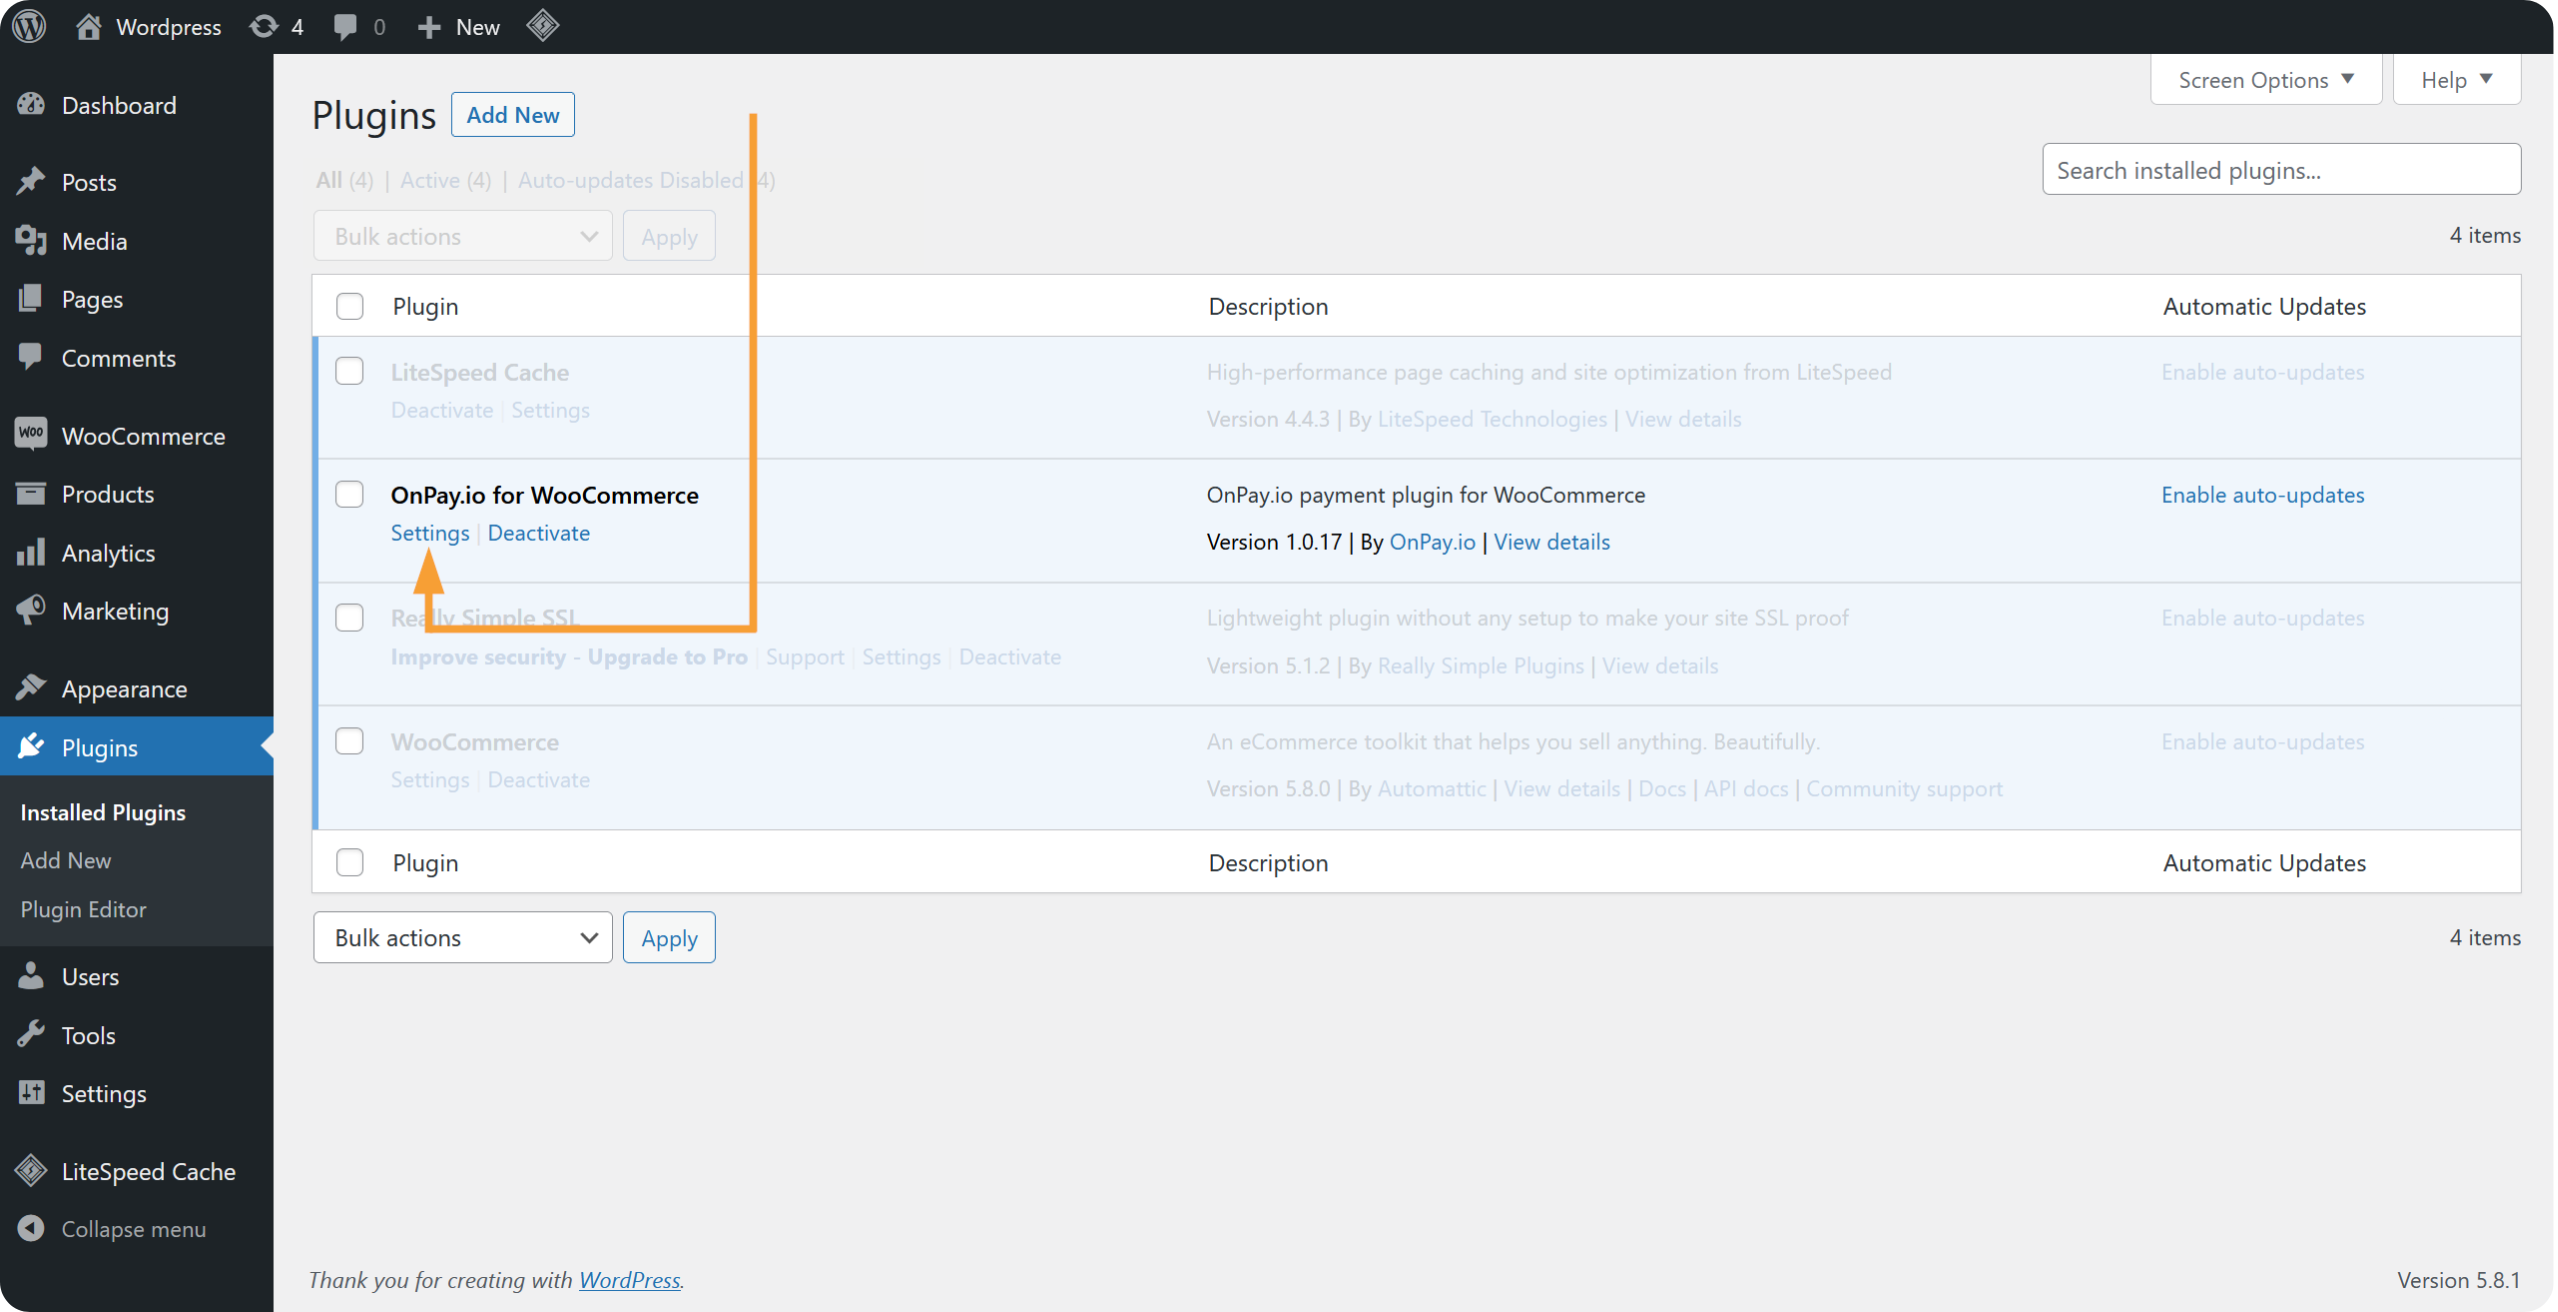
Step 2: Access Plugin Settings
Once installed, go to your plugins, find OnPay, and click Settings.
Step 3: Connect OnPay to WooCommerce
You're now in the WooCommerce OnPay settings page, ready to connect.
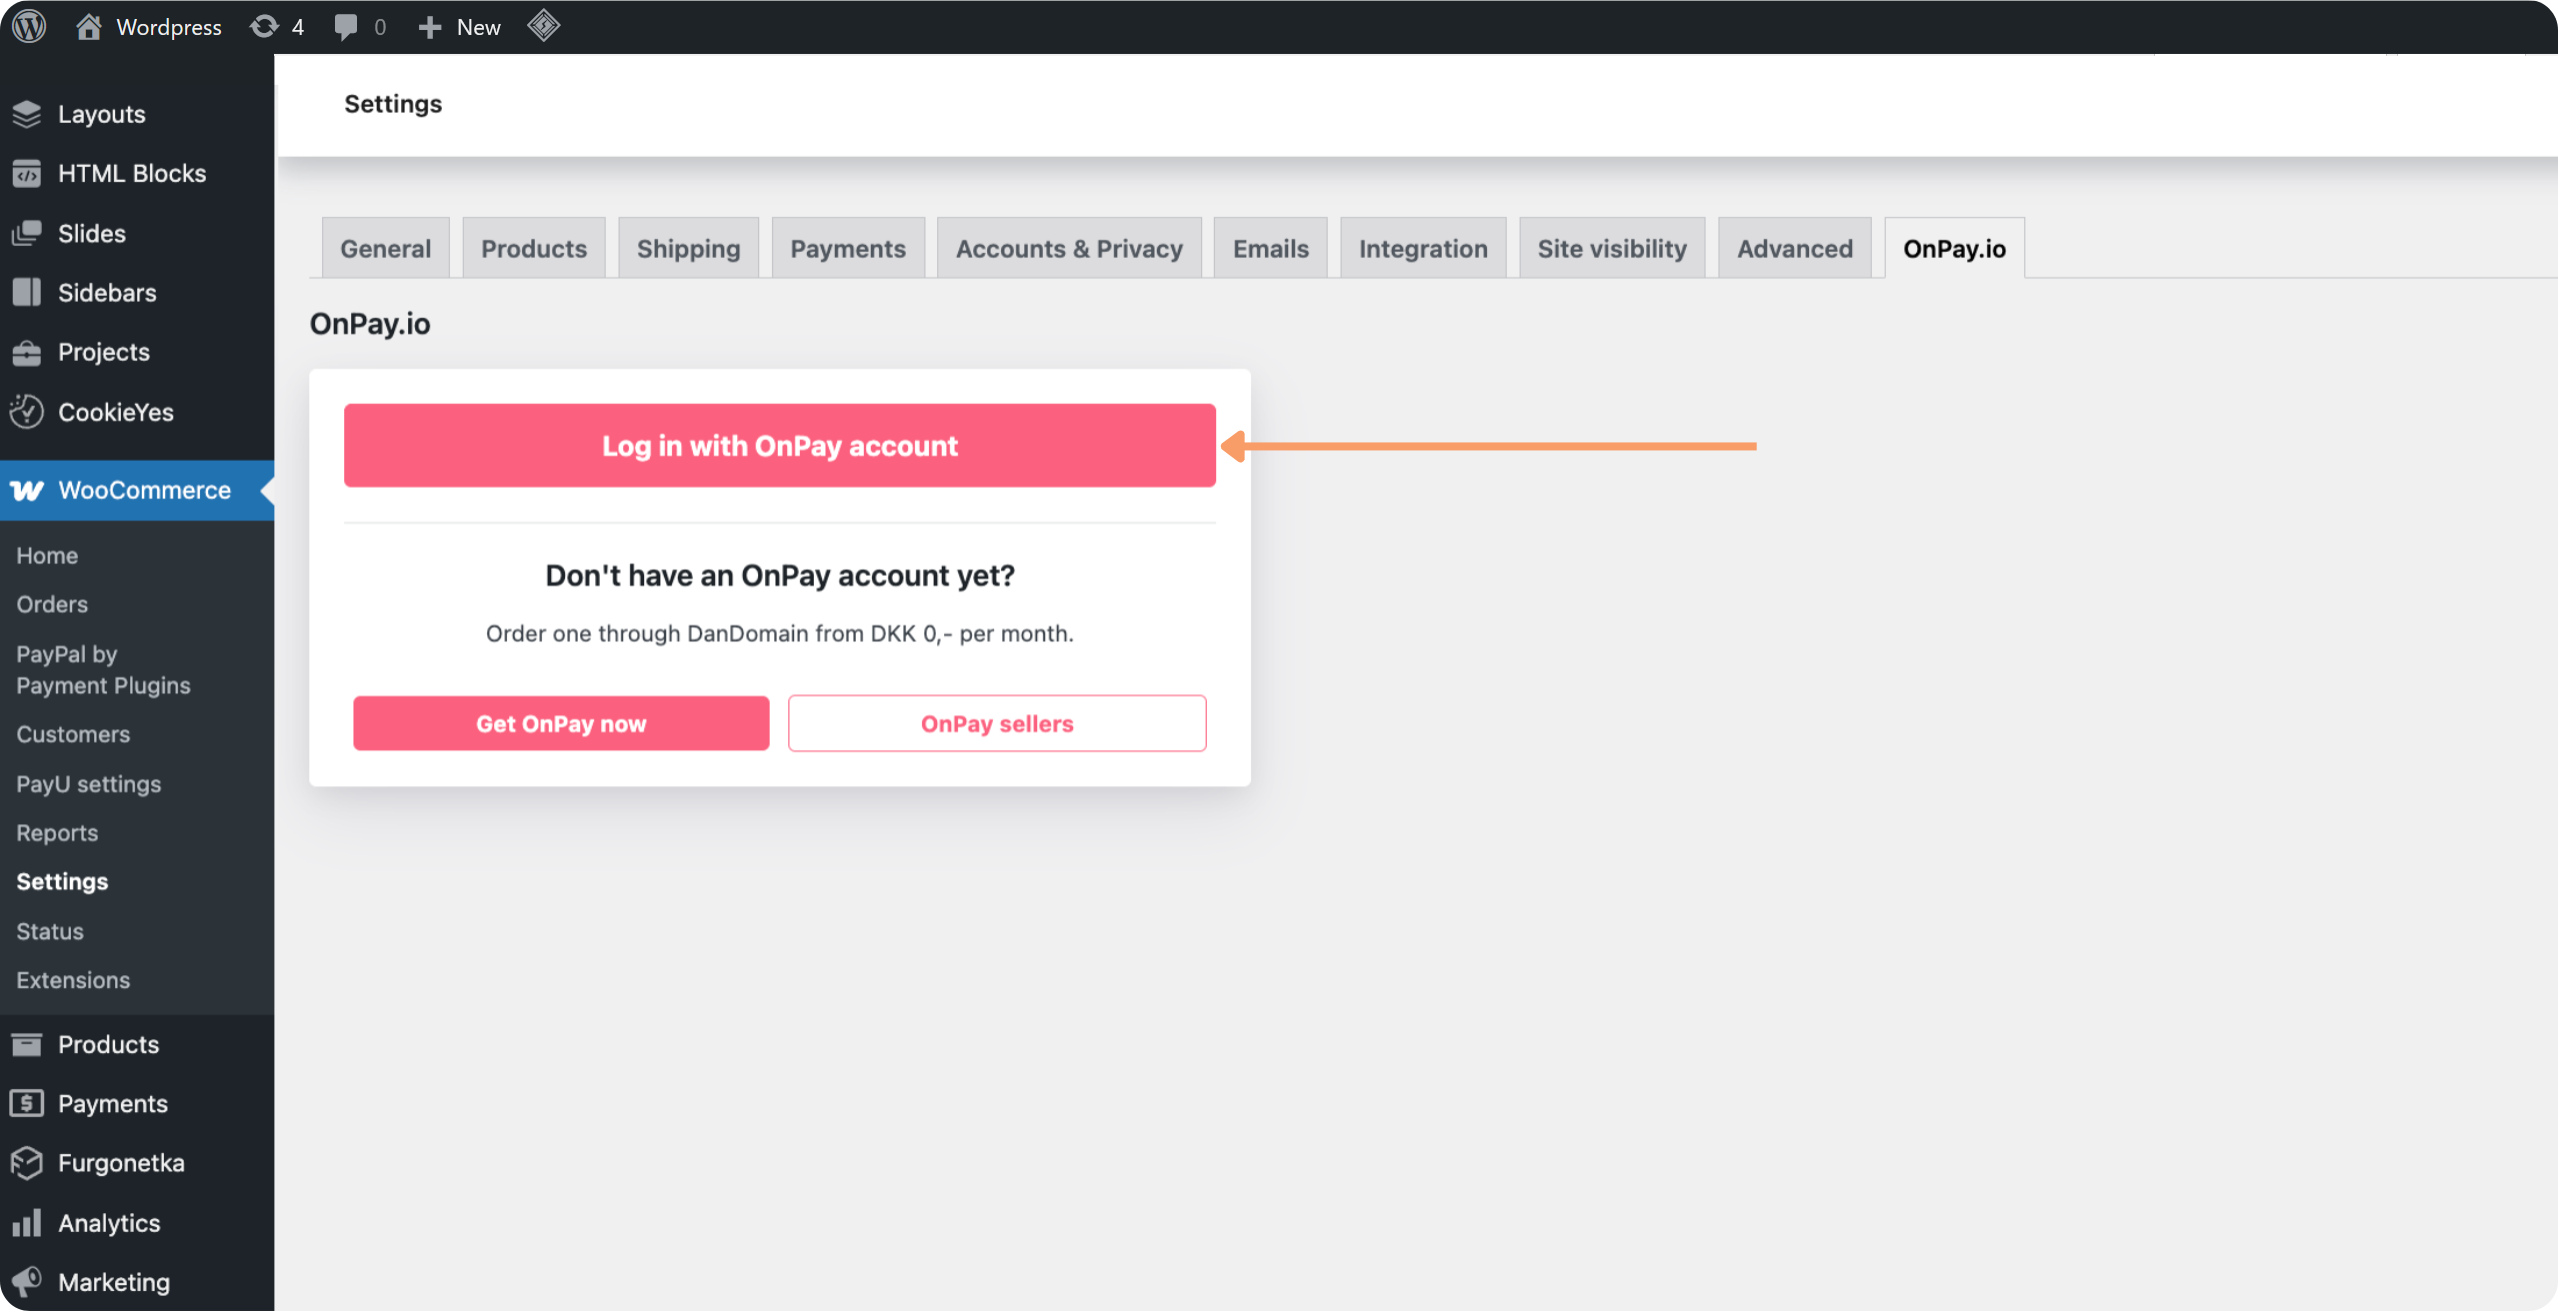
Before you click the button below, we recommend one quick step: Open your OnPay account in another browser tab and log in. This way, when you connect, we can securely verify your account automatically — no need to manually enter codes or credentials.
How to access OnPay:
- If you use a reseller platform: Access OnPay through your platform's control panel
- If you have OnPay credentials: Go to onpay.io and log in
Keep that tab open. Now, back in WooCommerce, click the pink button: "Log in with OnPay account"
If you opened OnPay first (recommended)
You'll see a screen asking to approve access for "Onpay WooCommerce" to use your gateway.
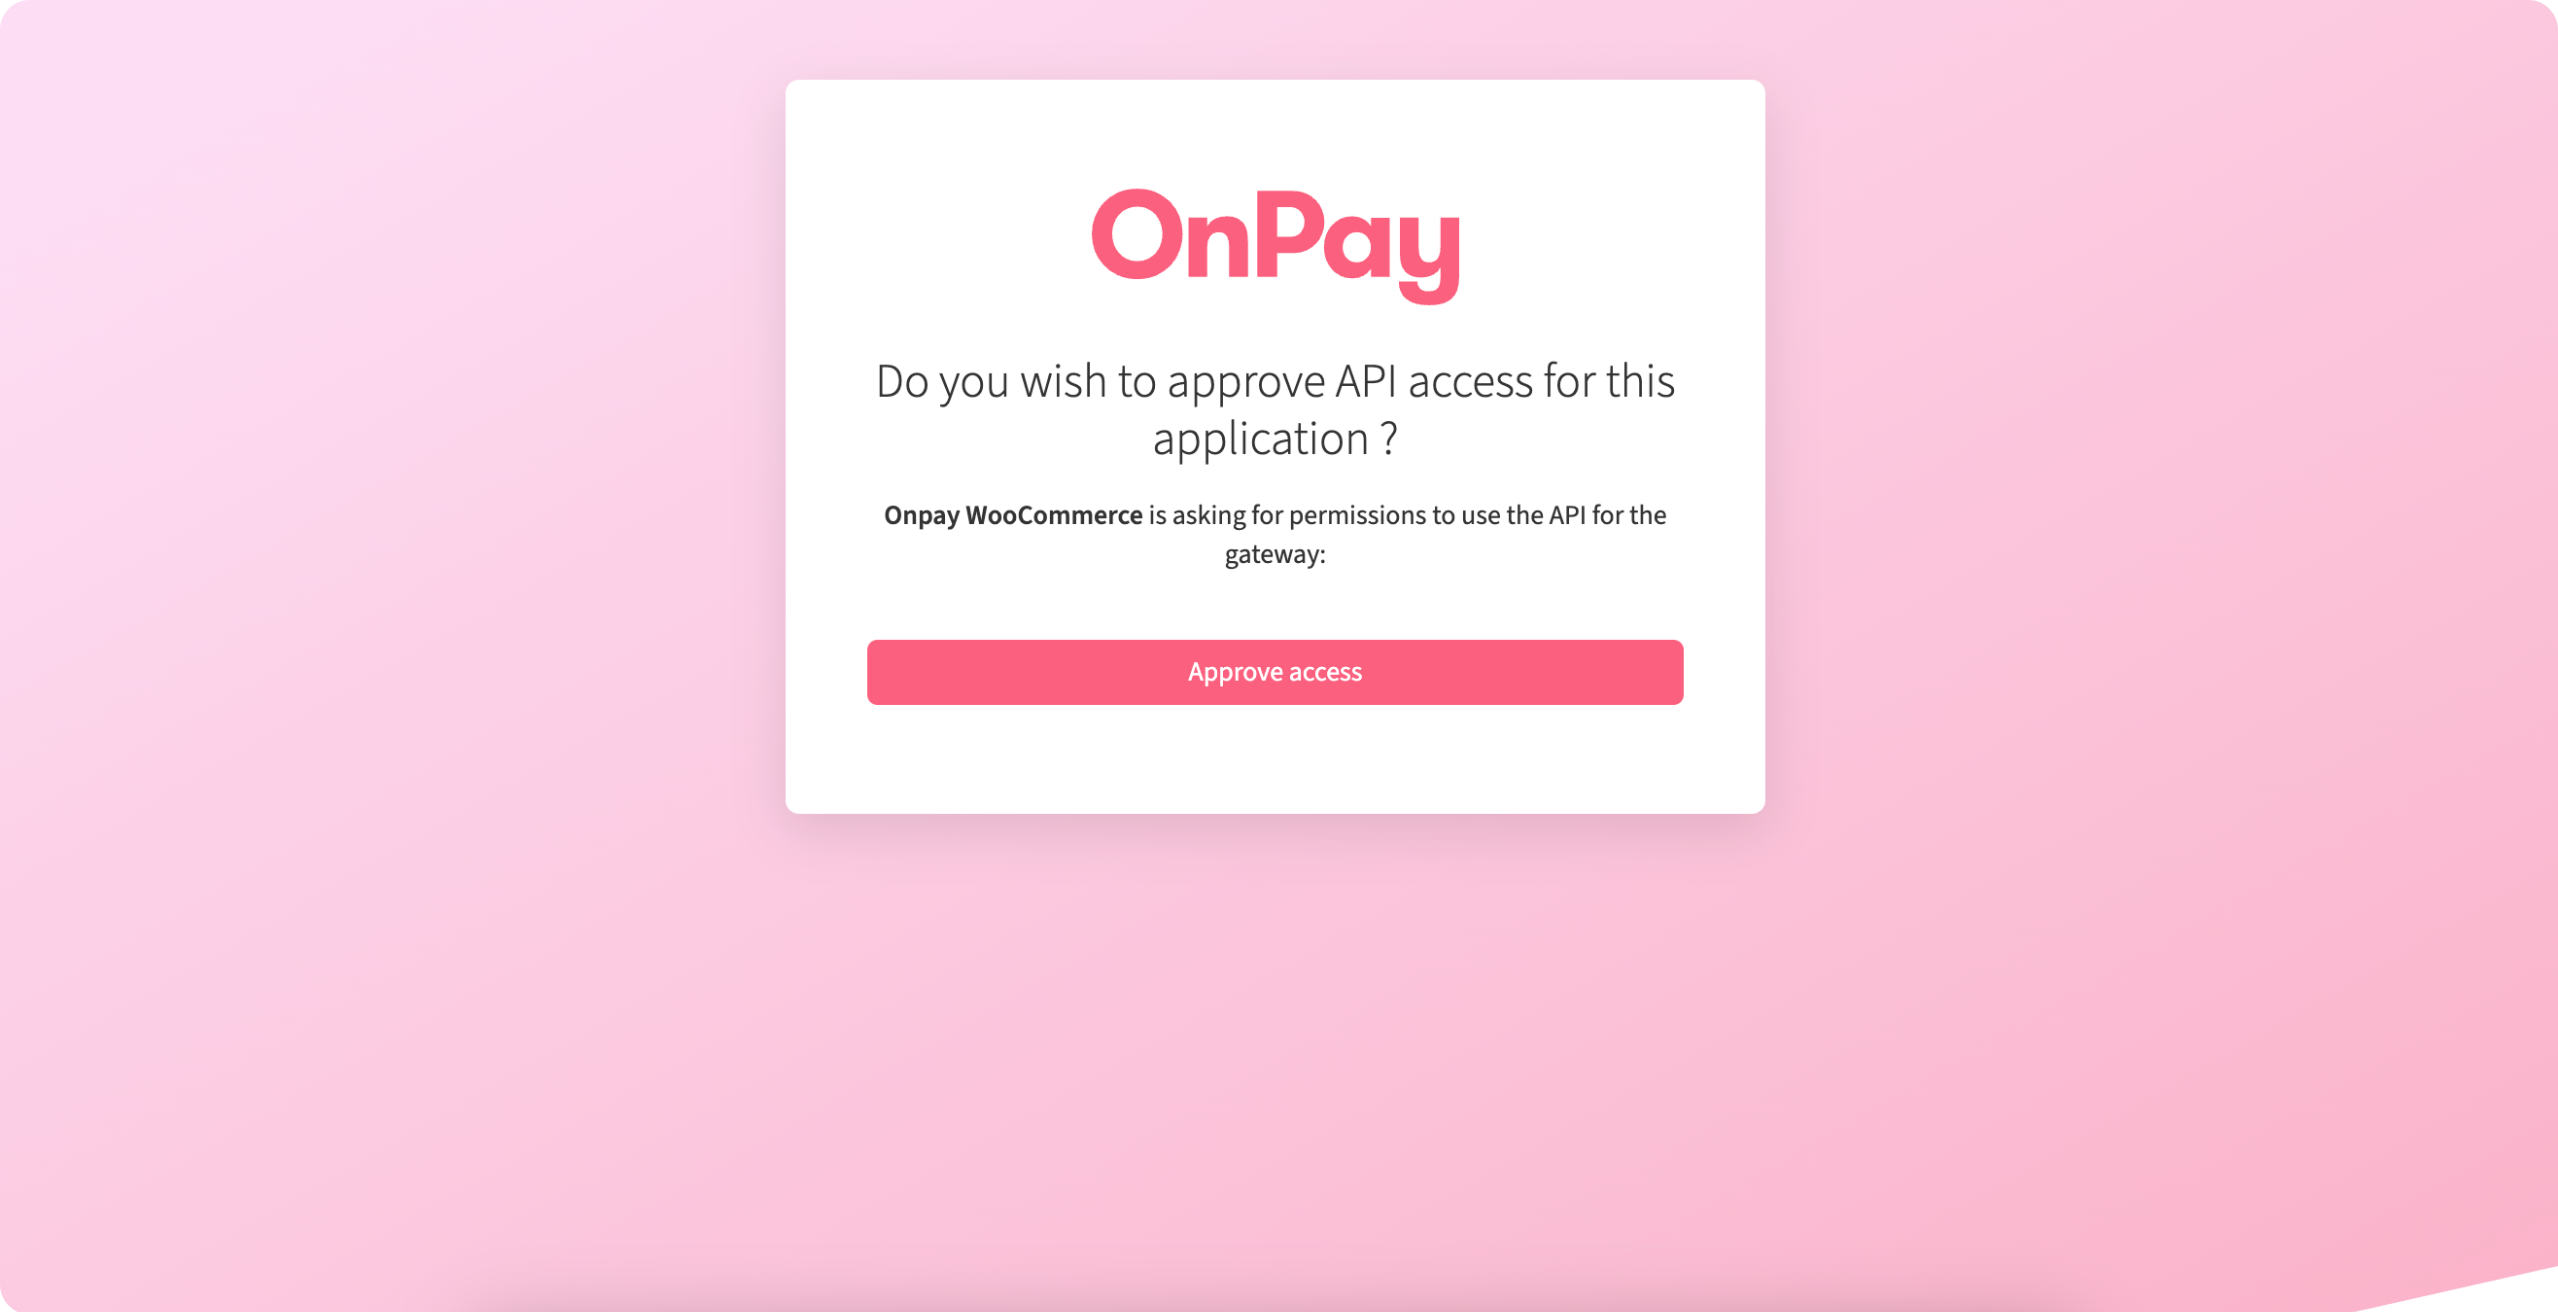 Click "Approve access"
Done! You'll be automatically redirected back to WooCommerce with everything connected.
Alternate method: Using an authorization code
If you see a screen asking for an Authorization Code:
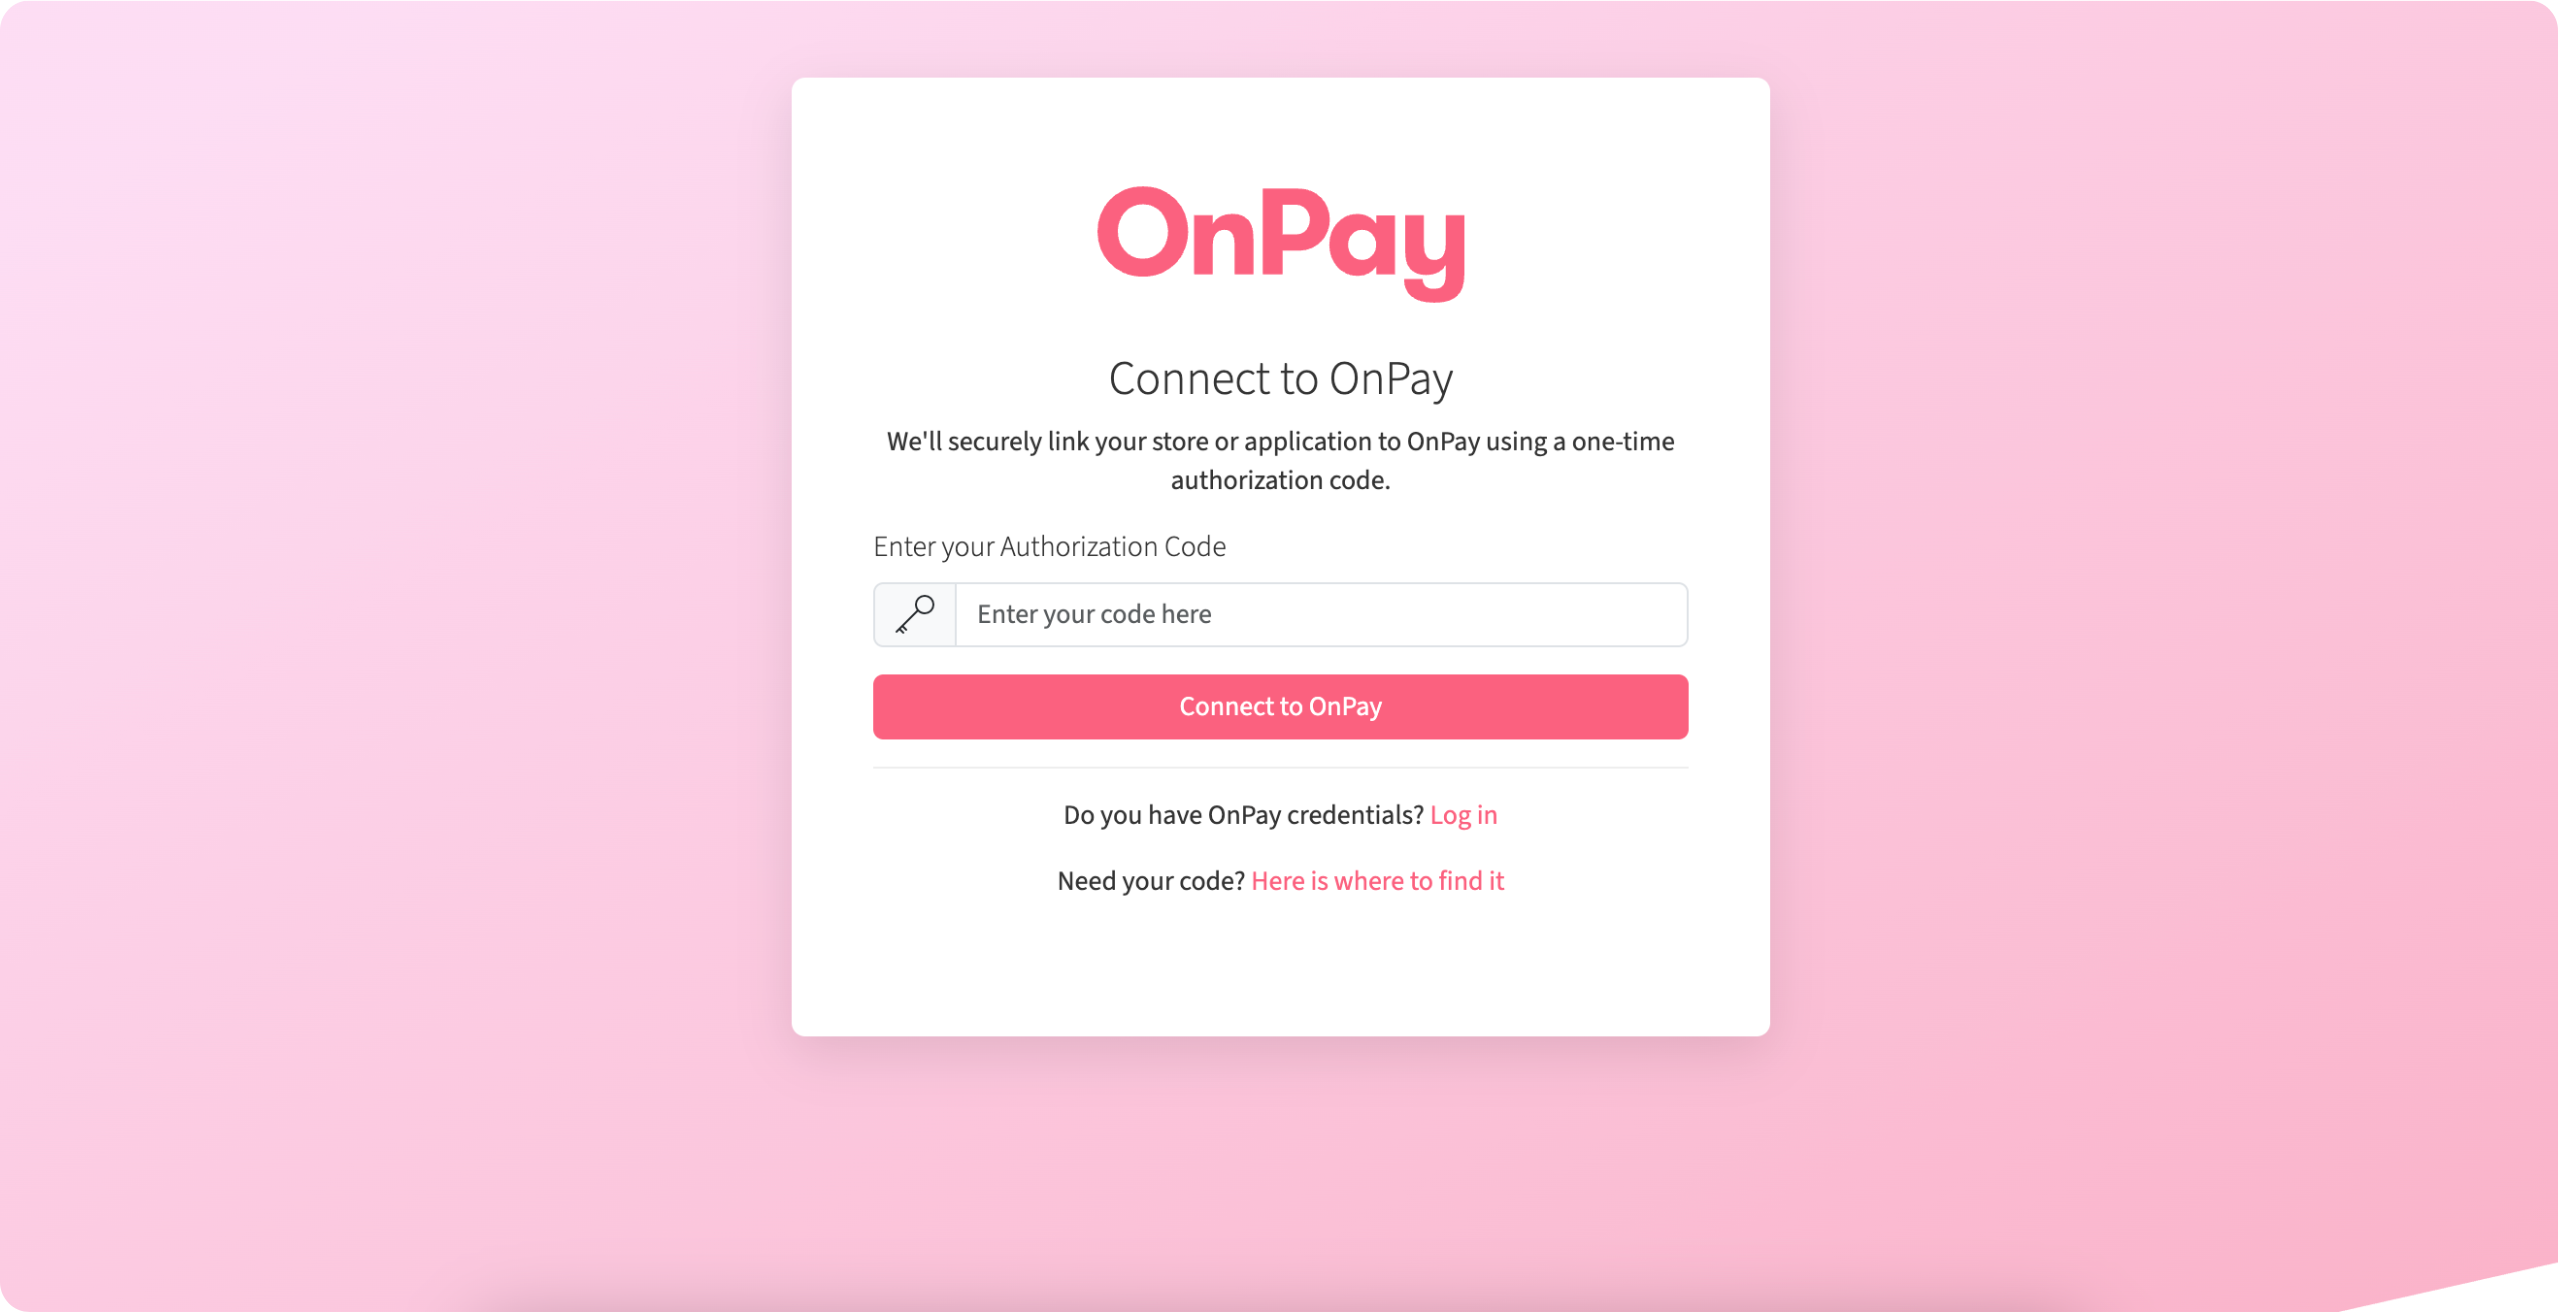
Here's what to do:
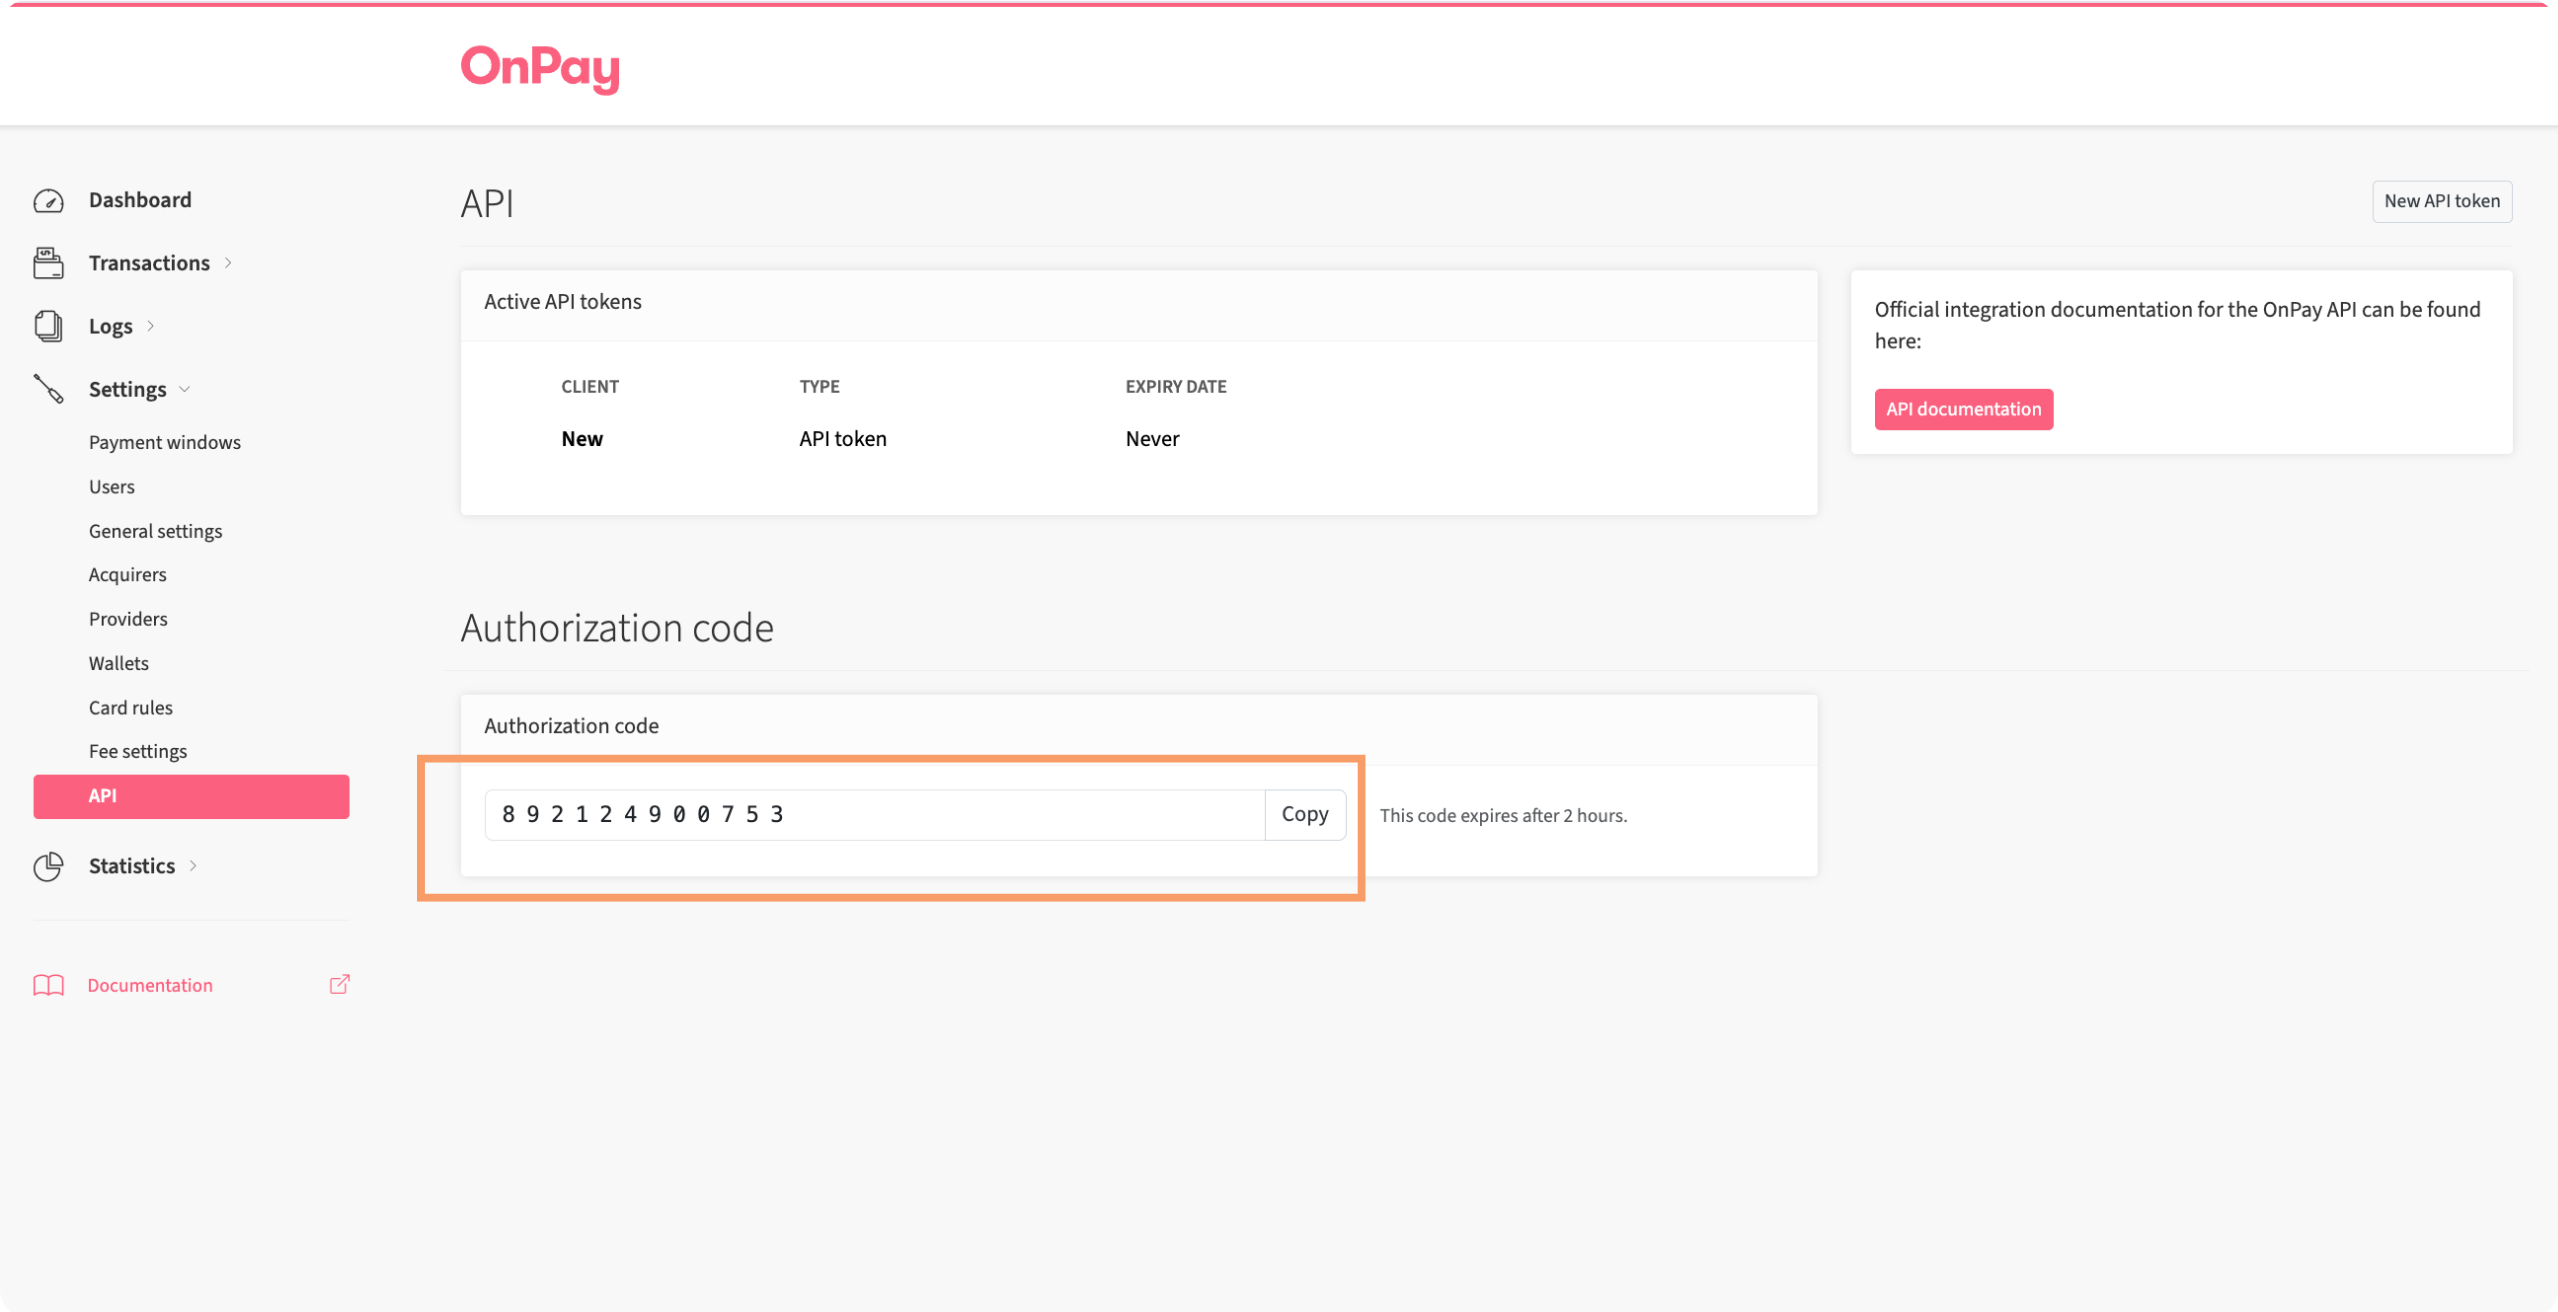
- Log in to OnPay (via onpay.io or your reseller platform)
- Go to Settings → API
- Copy the code from the "Authorization code" section
- Paste it into WooCommerce and click "Connect to OnPay"
You'll then see the approval screen — click "Approve access" and you're connected.
Step 4: Configure your settings
Once connected, you'll see your Gateway ID and Secret automatically filled in.
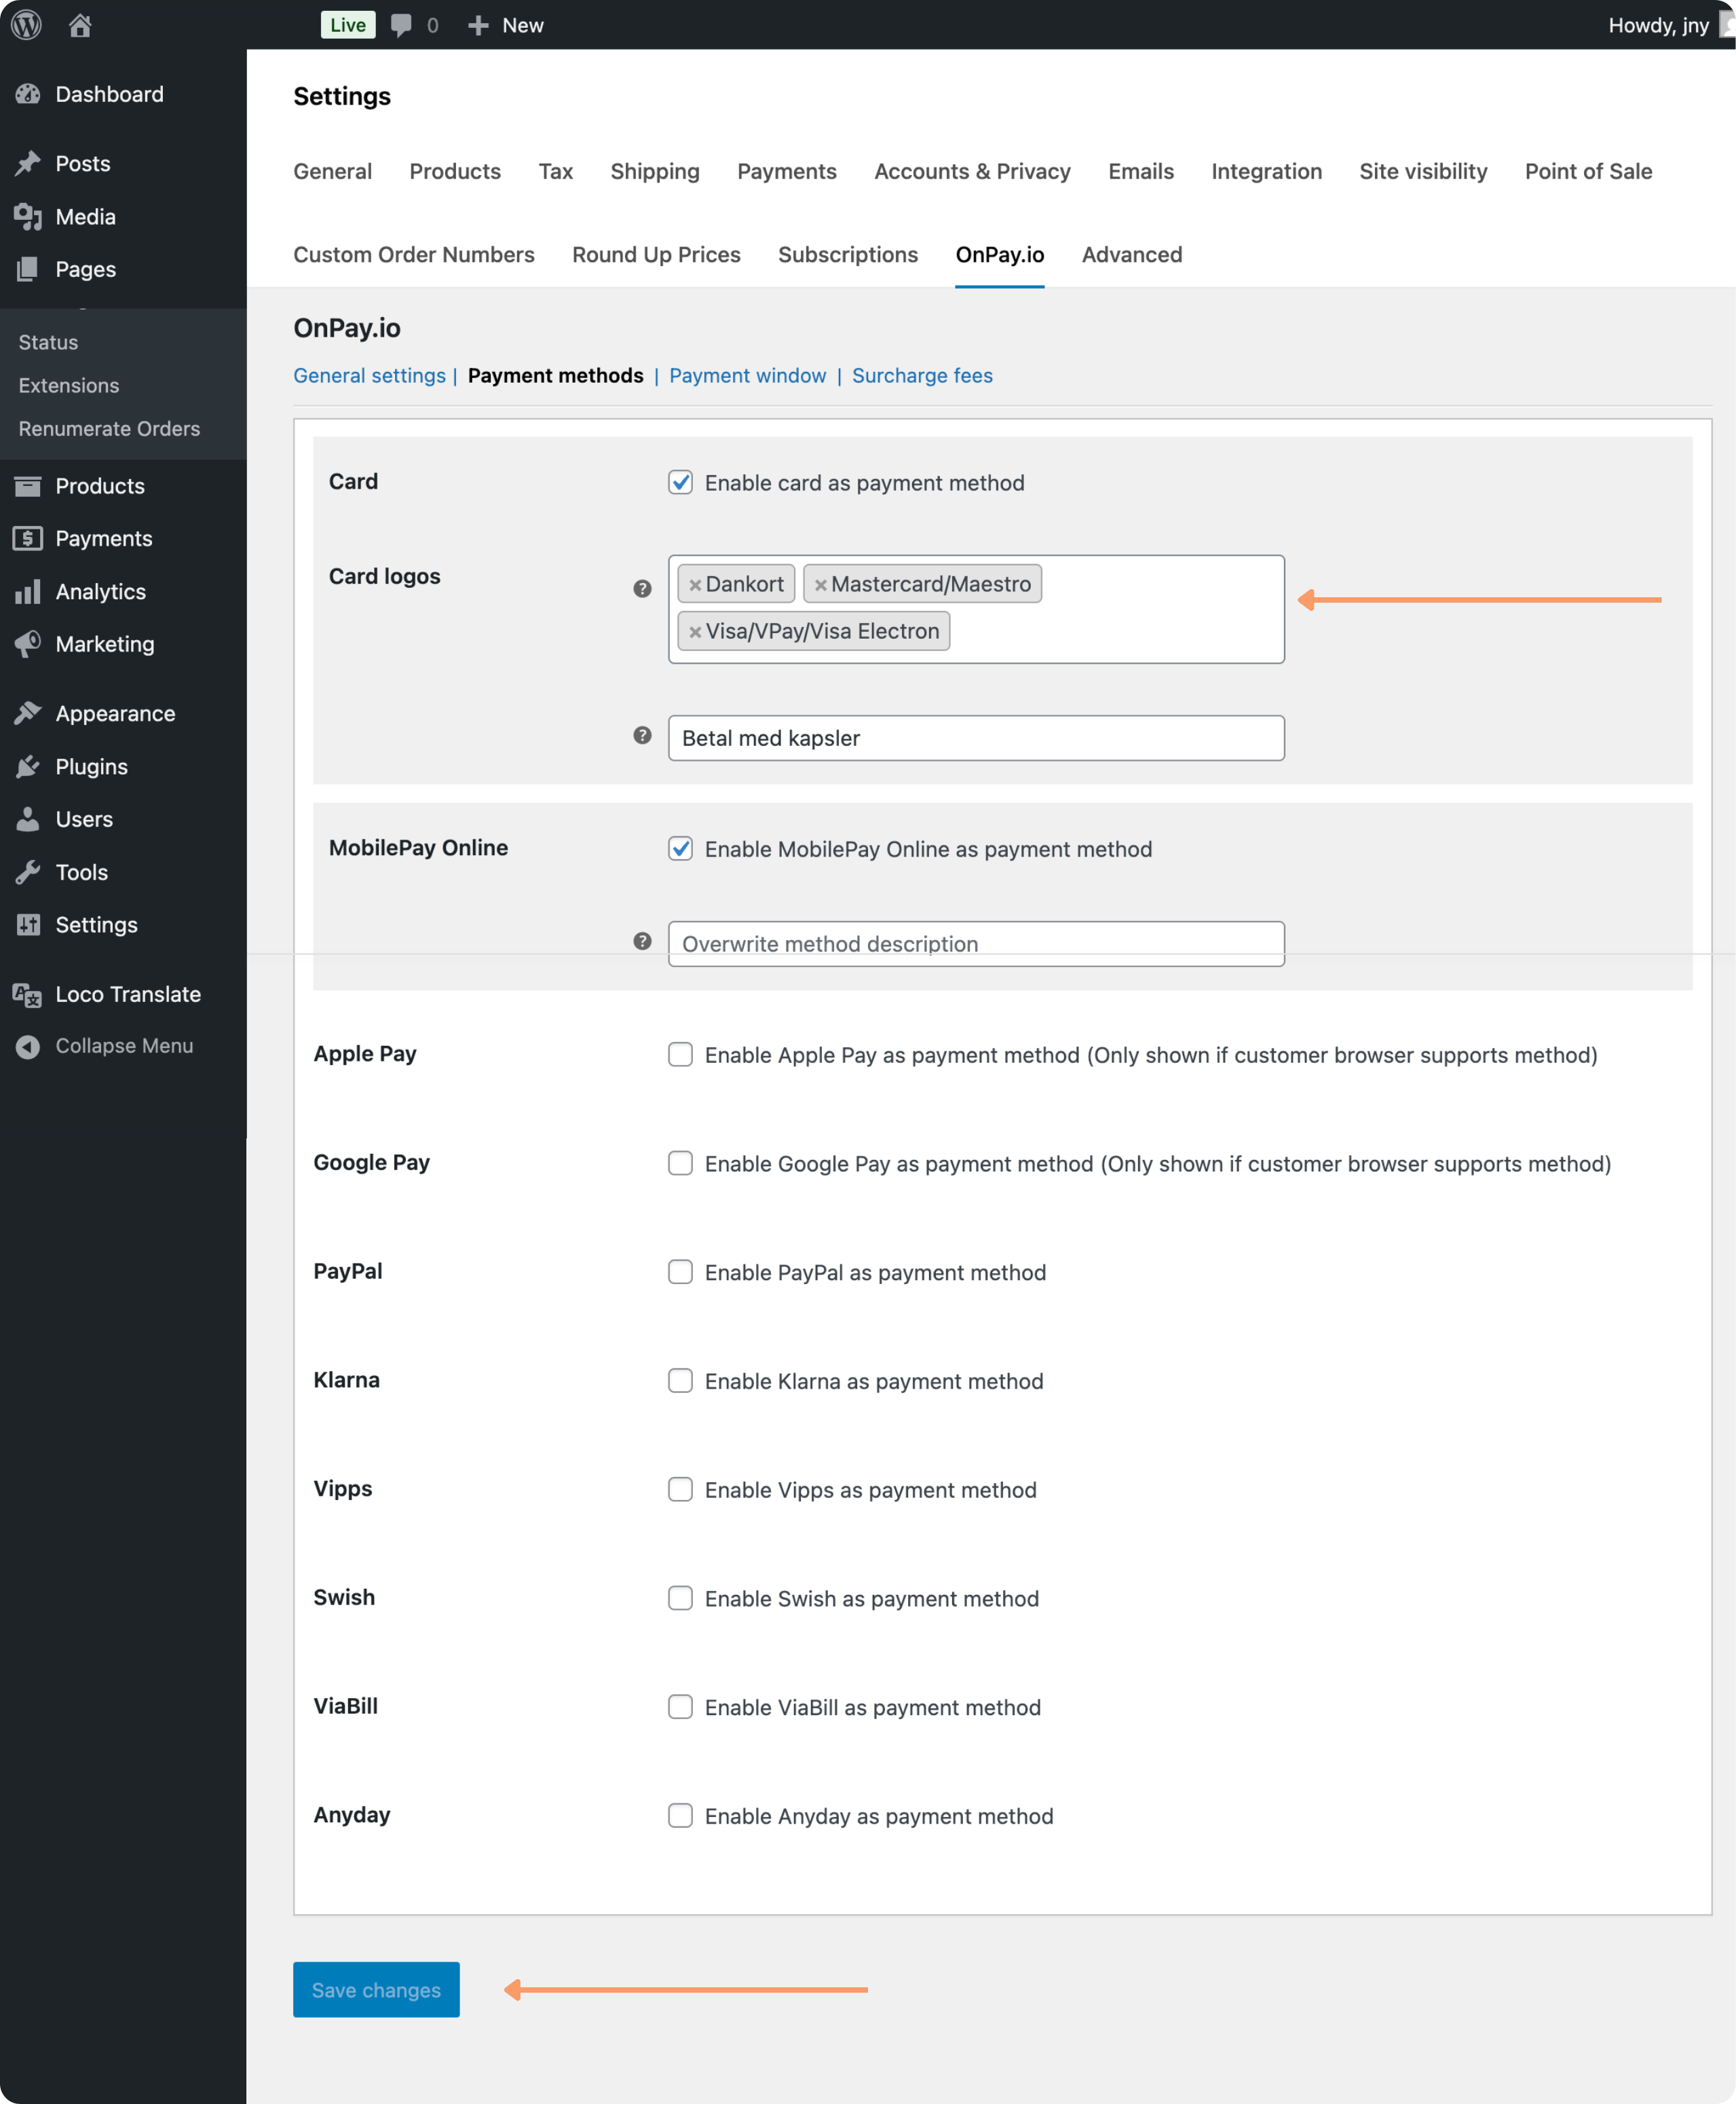
Choose your payment methods
Select which payment methods you want to offer:
- Card types: Visa, Mastercard, Dankort, etc.
- Wallets: MobilePay, Apple Pay, Google Pay
- Buy now, pay later: Klarna, PayPal, Viabill
Important: Only enable payment methods that match your OnPay account and acquirer agreement. If you enable a method you haven't set up in OnPay, it won't work.
Optional settings
Automatic capture
When enabled, payments are automatically captured when you mark an order as "Completed" in WooCommerce. This means funds transfer to your account without you needing to manually capture each transaction in OnPay.
Refund integration
When enabled, you can process refunds directly from the WooCommerce order page using the built-in refund button. OnPay handles the refund and updates the payment status automatically.
Payment window design
Choose the design template you created in OnPay. This controls how your payment page looks to customers.
Payment window language
Set the default language for checkout, or enable automatic detection to match your shop's language.
Test mode
Enable this to run test transactions. Only works if test mode is already enabled in your OnPay dashboard.
Click "Save changes" when you're done.
Step 5: Test your setup
Before going live, make sure everything works:
- Enable test mode in both OnPay and WooCommerce
- Make a test purchase on your shop using OnPay test cards
- Check that the transaction appears in your OnPay dashboard
- Disable test mode when you're ready for real payments
- Make a small real purchase to confirm everything flows correctly
Remember: Wallets like Apple Pay and Google Pay rely on your card acquirer agreement, so make sure those are set up in OnPay first.
Need help?
Contact your reseller for setup questions and technical support. They know your specific configuration and can troubleshoot faster.
Please note: When contacting support, mention your Gateway ID. This ID is unique to your OnPay account and is located at the bottom of the left menu in your dashboard.