OnPay and SimplyBook.me

In this article, we show you how to set up OnPay with SimplyBook.me.
Use our step-by-step guide
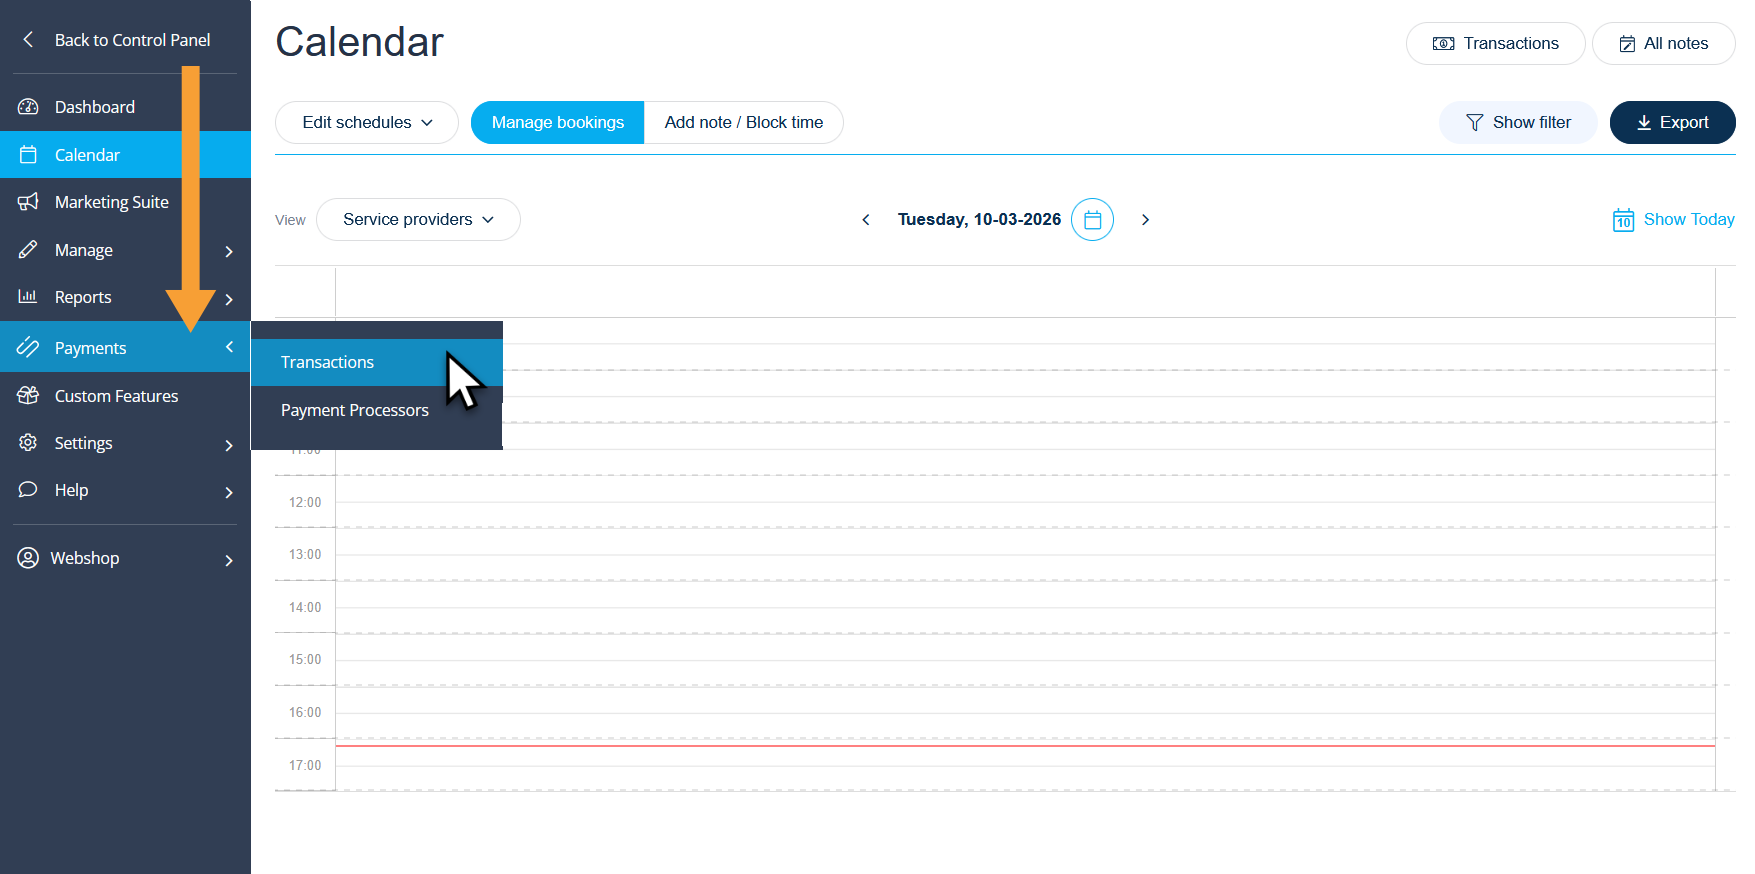
Step 1
Log in to the booking system and click on “Payments > Transactions” in the left-hand menu:
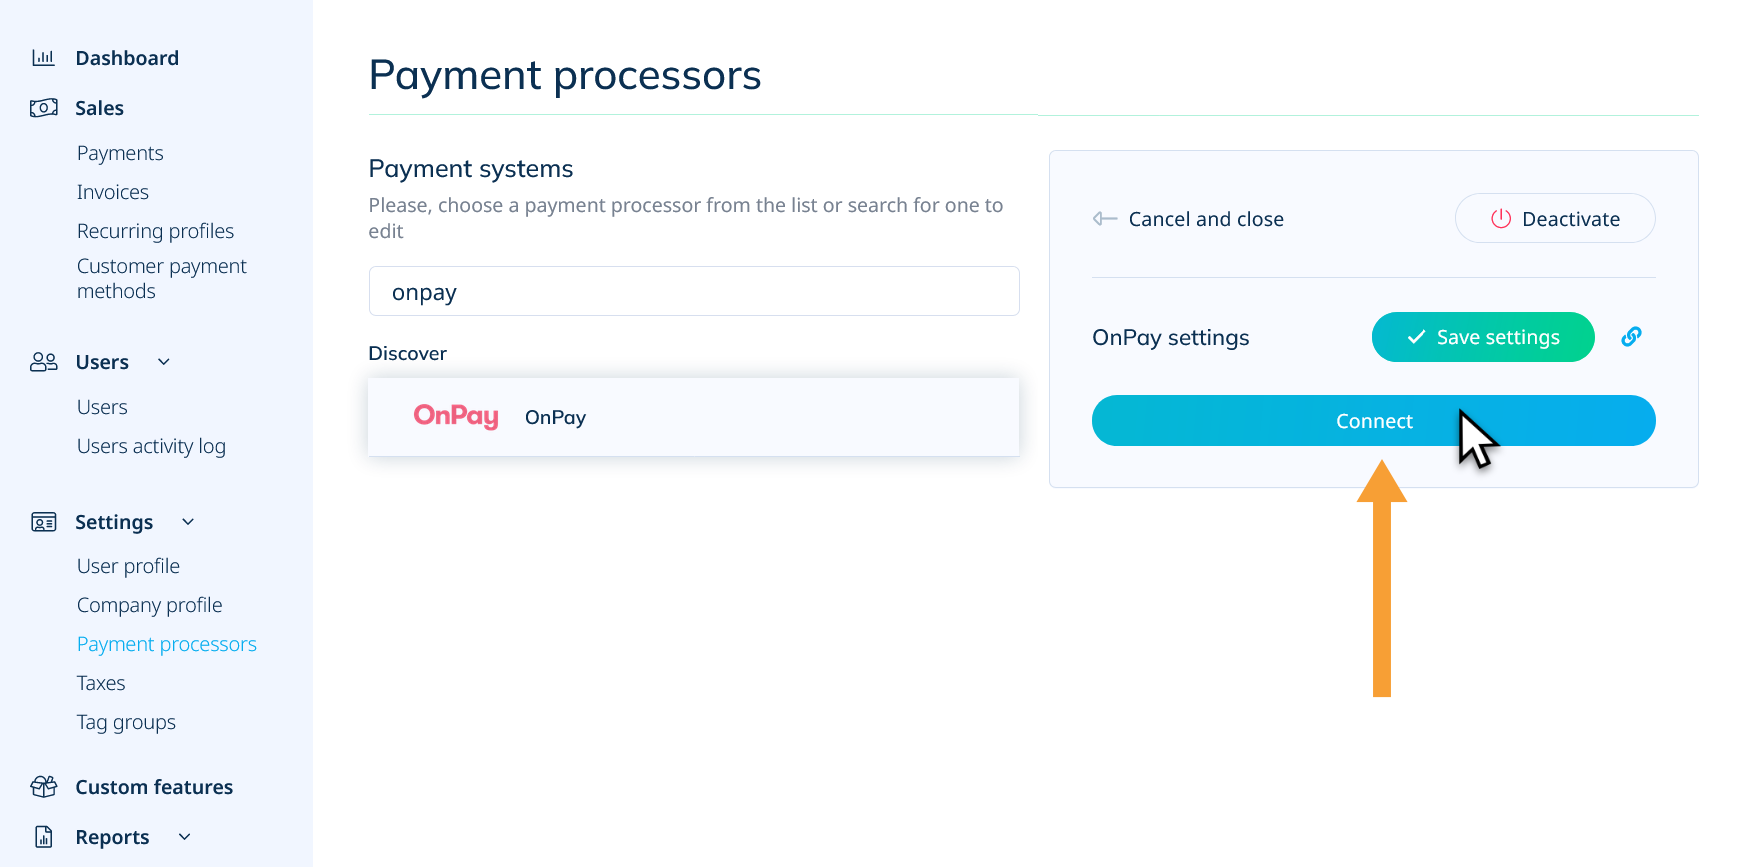
Step 2
This will open a new page where payments in SimplyBook.me are managed. Follow the 3 steps below:

- Click on “Payment processors” in the left-hand menu.
- Search for “onpay” in the search field and click on “OnPay” in the search results.
- Click on the “Activate” button to activate OnPay as a payment solution in the booking system.
Step 3
Click “Connect” to connect to OnPay:
Step 4
Approve the connection by clicking “Approve access”:
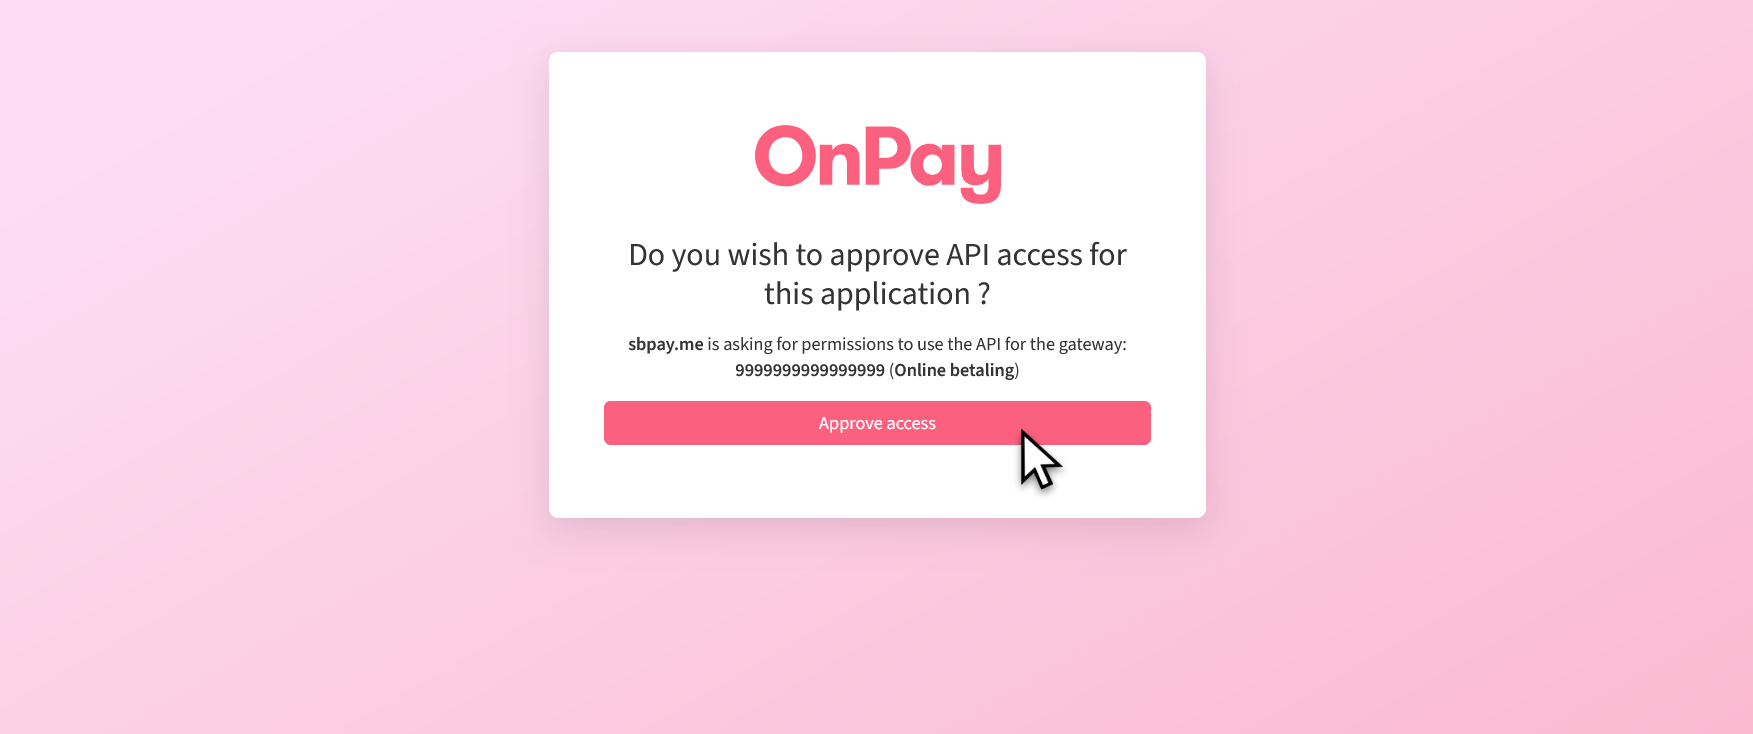
Note: If your email address is used to manage multiple OnPay solutions, you will be asked to enter the desired Gateway ID before you can approve the connection.
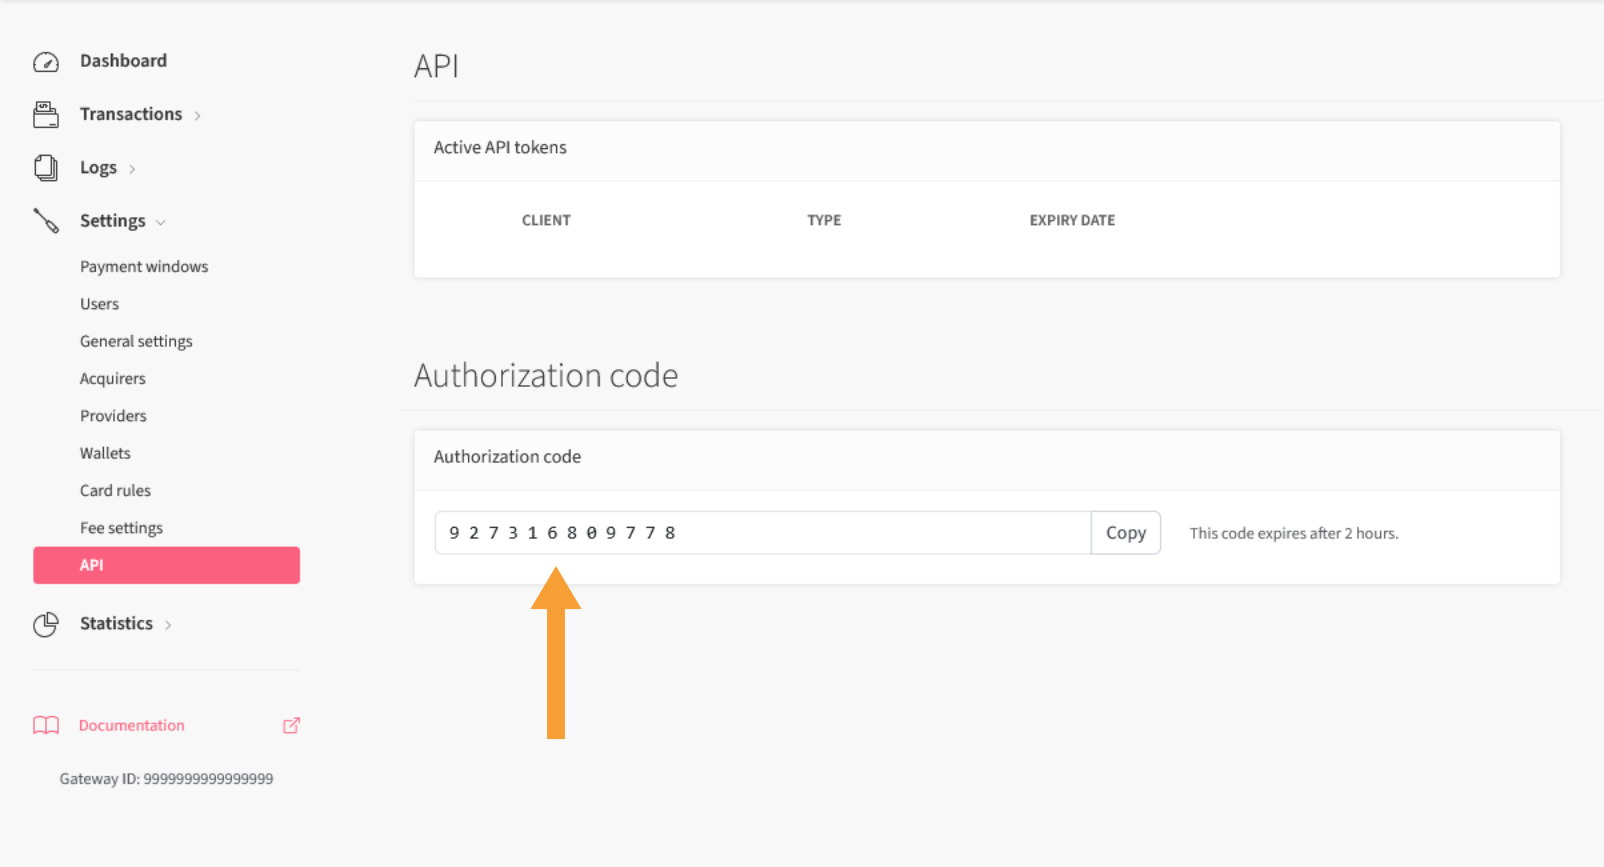
If you are not already logged into OnPay, you will be prompted to enter an authorization code:
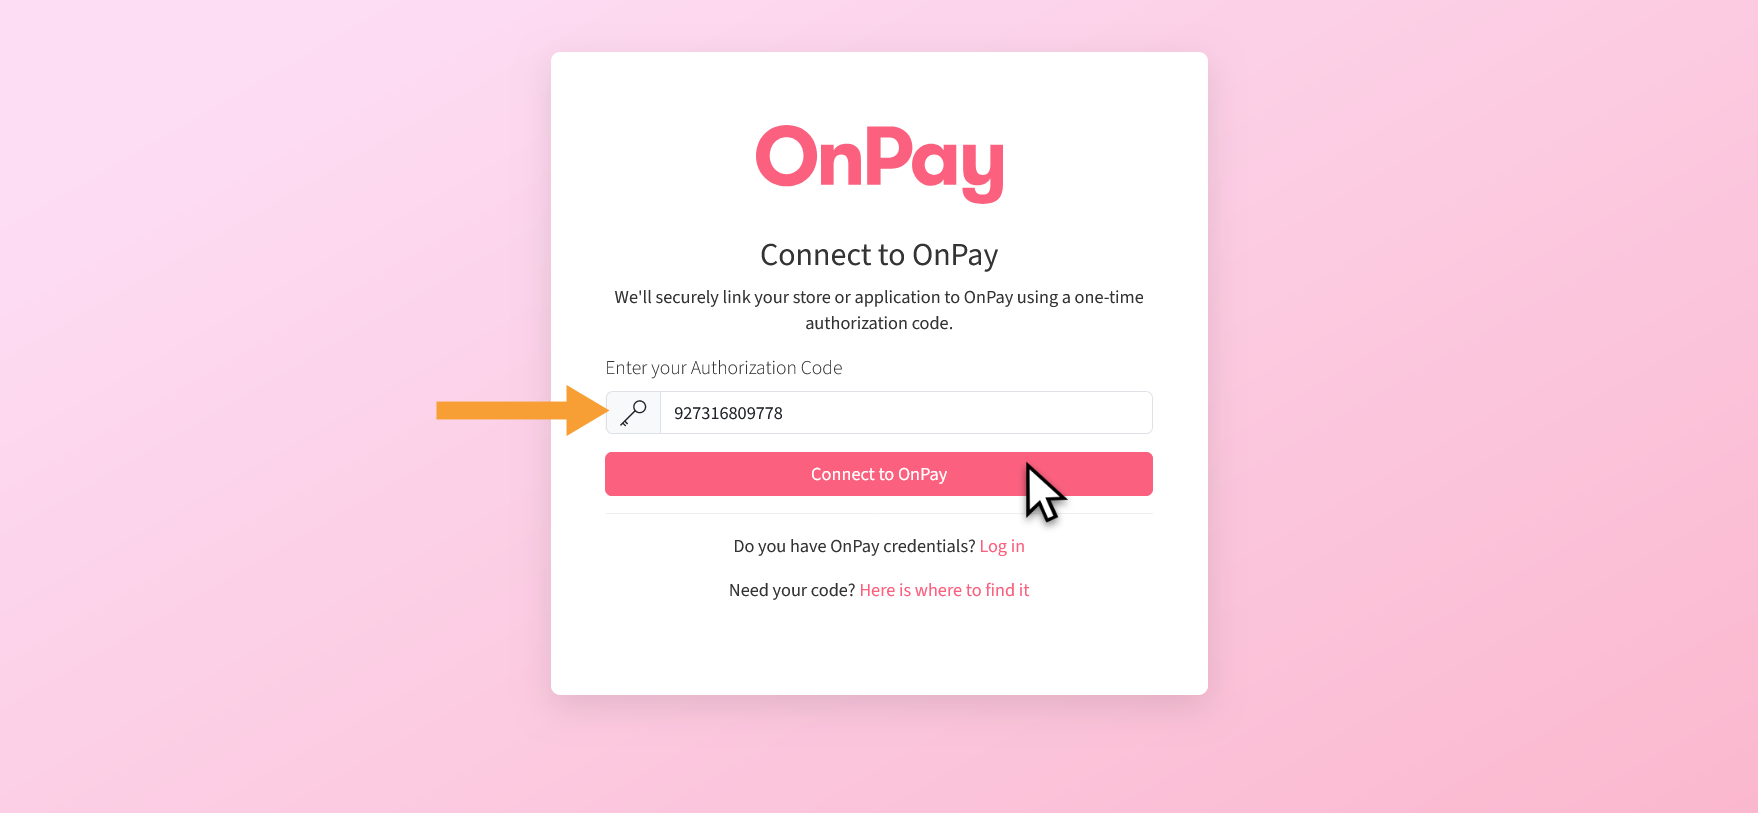
You will find the code in OnPay under the menu item “API” in the field “Authorization code”:
Step 5
Remember to test the setup both with test cards (as long as the payment system is in demo mode) and finally with a real payment card. You can find test cards here. Remember that wallets such as MobilePay, Google Pay, and Apple Pay also cover an underlying payment card, which in that case must be included in the merchant agreement.